


Distributed Denial of Service (DDos) attack renders a Magento 2 store unusable for clients and customers. Your online shop is flooded with so much traffic that the server goes above 100% load and freezes.
You might want to protect an ecommerce website from DDoS. I’ll show you 7 ways how you can safeguard Magento 2 from unwanted traffic.
Disclaimer: My recommendations don’t guarantee a full protection. Always seek professional help if you are unsure of what you are doing. Apply the following list at your own risk.
Table of Contents:
- Fail2Ban
- Get Instant Notifications When the Website Goes Down
- Use Varnish Cache for Better Time to First Byte (TTFB)
- Use Nginx Web Server and its DDoS Mitigation Features
- Magento 2.4.7+ Rate Limiting
- Disable Guest Checkouts and turn on Customer Email Verification
- Cloudflare DDoS Protection Options
1. Fail2Ban
Fail2Ban is a special server program that can blacklist suspicious IP addresses.
It’s highly configurable and could block IPs that do too many requests per second.
For example, someone is hitting your /catalogsearch/result?q pages (that are uncached) requesting 10 pages per second. No human can do that and it could be safely blocked to prevent the server from going 100% CPU and slowing down.
Here is a sample fail2ban filter to protect catalog search:
catalog-search-protect.conf:
[INCLUDES]
before = apache-common.conf

[Definition]
failregex = ^<HOST> - - \[[^\]]*\] "(GET|POST) /catalogsearch/
ignoreregex =
And a corresponding jail:
[catalog-search-protect]
enabled = true
port = http,https
filter = apache-specific-url
logpath = %(apache_access_log)s
bantime = 48h
maxretry = 10
findtime = 1
The program will ban an IP if it requests /catalogsearch/ more than 10(maxretry) times within 1(findtime) second.
2. Get Instant Notifications When the Website Goes Down
The earlier you get involved with fighting an active DDoS attack the better. It usually takes time to identify abusing IPs, blacklist them and do other related things.
To buy yourself some time, get notified instantly of the website slowing down or going down completely.
There are online services that track websites availability and notify of any down time. Just google for ‘website uptime monitoring’.
You can also set up a server script that works with the Telegram instant notification app. The script checks on the website and sends a message to your phone when your site is down.
The setup is pretty simple:
2.2. Create a Telegram bot.
Once you install Telegram you have to create a bot. Bot is a special thing that will be actually doing all the dirty work. You will reference a bot by its Bot Token.
Go to https://telegram.me/botfather in your browser on your phone:
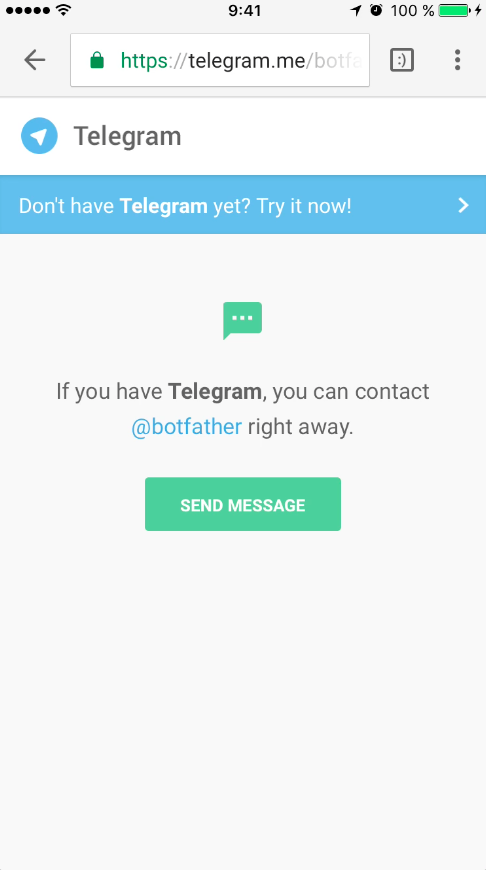
Click on send message and it will bring up Telegram app with botfather chat open.
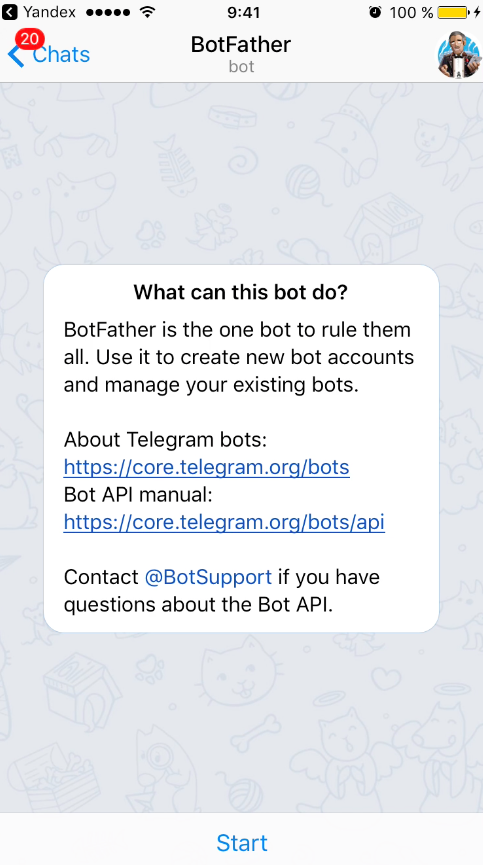
With botfather help you will create your own bot.
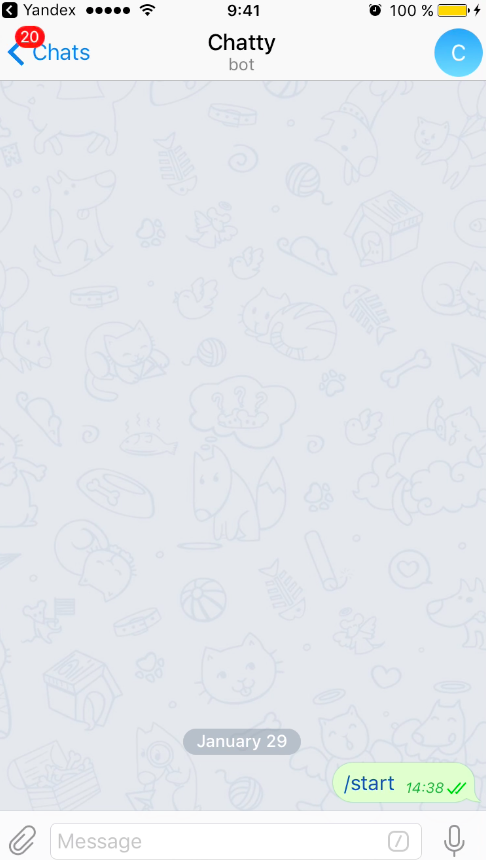
Now click on Start and then type in /newbot:
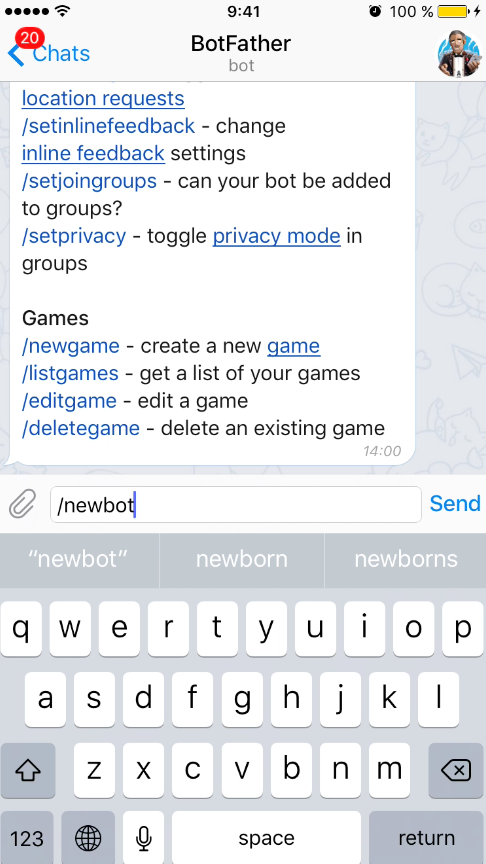
Click send. It will ask for bot name. Enter any name you like (for example 'chatty'). Click send.
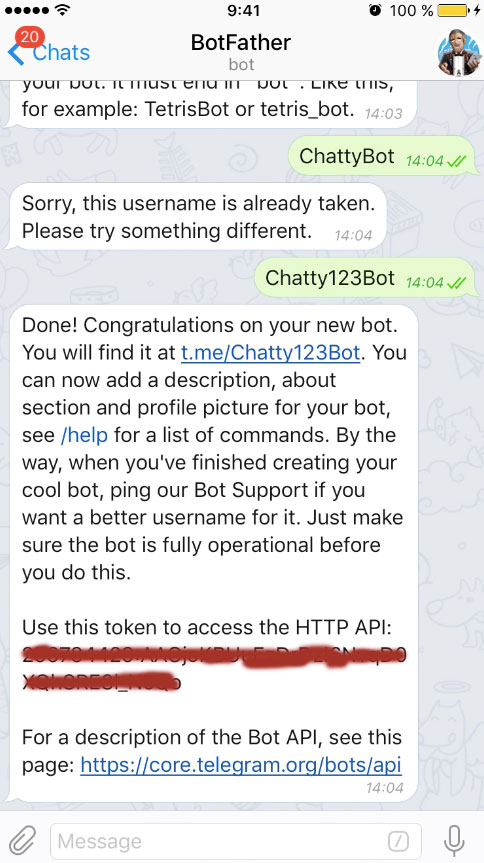
Then it will ask for bot username. It must end with 'bot'. Choose any username you like for example chatty123Bot. (chattyBot might have been already taken by somebody else)
Then telegram will create your new bot and will send its Bot Token:
Official documentation can be found here.
Now go to https://telegram.me/
It will open a telegram bot conversation window. Click Start.
Now we can move forward to installing Telegram PHP API.
You have to have PHP 7+ in order to run API.
2.3 Install Telegram PHP API
Here is a complete Telegram PHP API project on github.
You can install it with composer.
First create a directory:
mkdir telegram
Then go to that directory and create a composer project:
composer init
Answer a few questions, set the name of your project, author etc. It is all pretty much self explanatory.
Then open up the newly created composer.json and add a "unreal4u/telegram-api": "~2.3" require section so that composer.json looks like this (name,type,authors might vary):
{
    "name": "root/telegram",
    "type": "project",
    "authors": [
        {
            "name": "Konstantin G.",
            "email": "example@example.com"
        }
    ],
    "require": {
      "unreal4u/telegram-api": "~2.3"
    }
}
Once it is done install composer dependencies:
composer install
It will install telegram api and its dependencies:
root ~/telegram # composer install
Do not run Composer as root/super user! See https://getcomposer.org/root for details
Loading composer repositories with package information
Updating dependencies (including require-dev)
Package operations: 6 installs, 0 updates, 0 removals
  - Installing psr/log (1.0.2) Downloading: 100%
  - Installing guzzlehttp/promises (v1.3.1) Downloading: 100%
  - Installing psr/http-message (1.0.1) Downloading: 100%
  - Installing guzzlehttp/psr7 (1.3.1) Downloading: 100%
  - Installing guzzlehttp/guzzle (6.2.2) Downloading: 100%
  - Installing unreal4u/telegram-api (v2.3.0) Downloading: 100%
Writing lock file
Generating autoload files
Telegram API should now be installed and ready to be used.
2.4. Send message to your bot within PHP
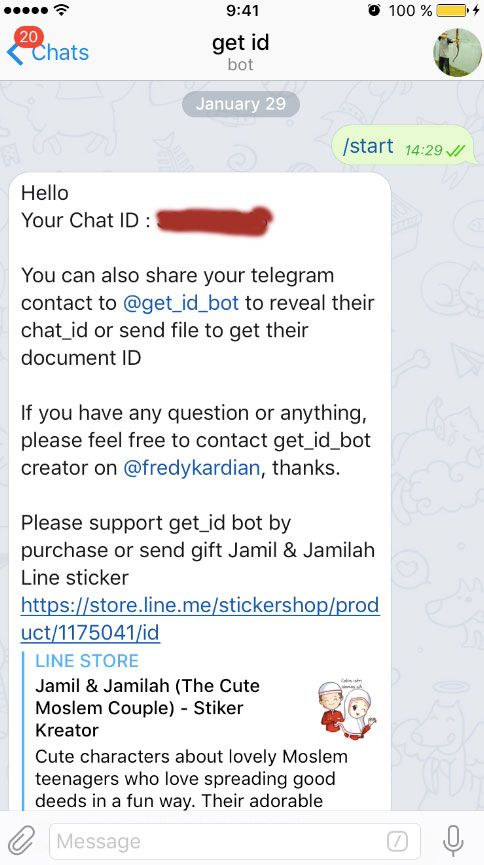
First we need to get bot chat id.
Go to https://telegram.me/get_id_bot in your browser on your phone. It should open up get id bot chat telegram window:
Click on Start. It should display your Chat ID:
Now go to telegram folder you created on your server (the one you installed telegram-api to).
cd telegram
Create a php file with the following contents:
<?php
include('vendor/autoload.php');
use GuzzleHttp\Exception\ClientException;
use \unreal4u\TelegramAPI\TgLog;
use \unreal4u\TelegramAPI\Telegram\Methods\SendMessage;
$tgLog = new TgLog('<BOT_TOKEN>');
$sendMessage = new SendMessage();
$sendMessage->chat_id = <CHAT_ID>;
$sendMessage->text = "test message";
try {
$tgLog->performApiRequest($sendMessage);
} catch (ClientException $e) {
echo 'Error detected trying to send message to user: <pre>';
var_dump($e->getRequest());
echo '';
die();
}
Where
Execute this script with php:
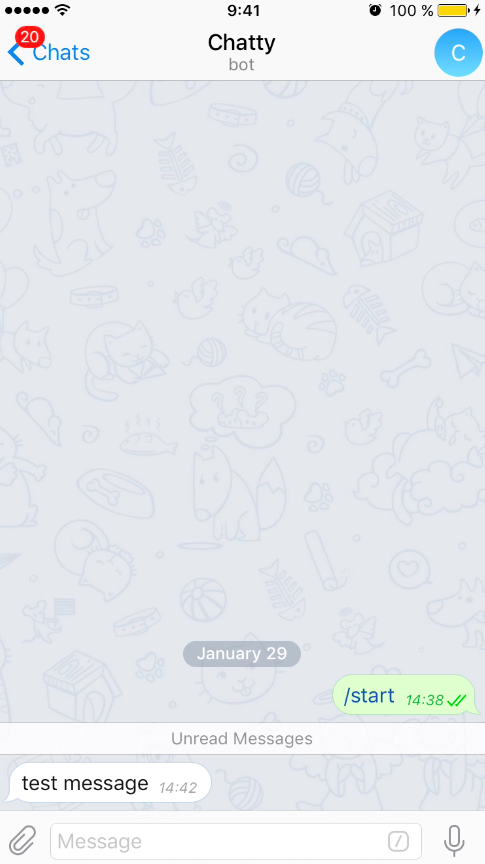
php test.php
You should now receive a test message right on your phone!
2.5 Monitor CPU usage with instant notifications
Now we will be able to create a monitoring bash script that will alarm us if CPU load exceeds certain threshold.
#!/bin/bash
load=`cat /proc/loadavg | awk '{print $1}'`
response=`echo | awk -v T=8 -v L=$load 'BEGIN{if ( L > T){ print "greater"}}'`
if [[ $response = "greater" ]]
then
 /usr/bin/php /root/telegram/send.php
fi
I have 8 CPU cores and I choose to get alarms when load exceeds 8.
3. Use Varnish Cache for Better Time to First Byte (TTFB)
Varnish Cache is a special server application. It caches HTTP requests and delivers exceptional server response times.
You install Varnish in front of the web server and configure Magento 2 to use it.
The Adobe Commerce team recommends using Varnish as a Caching Application.
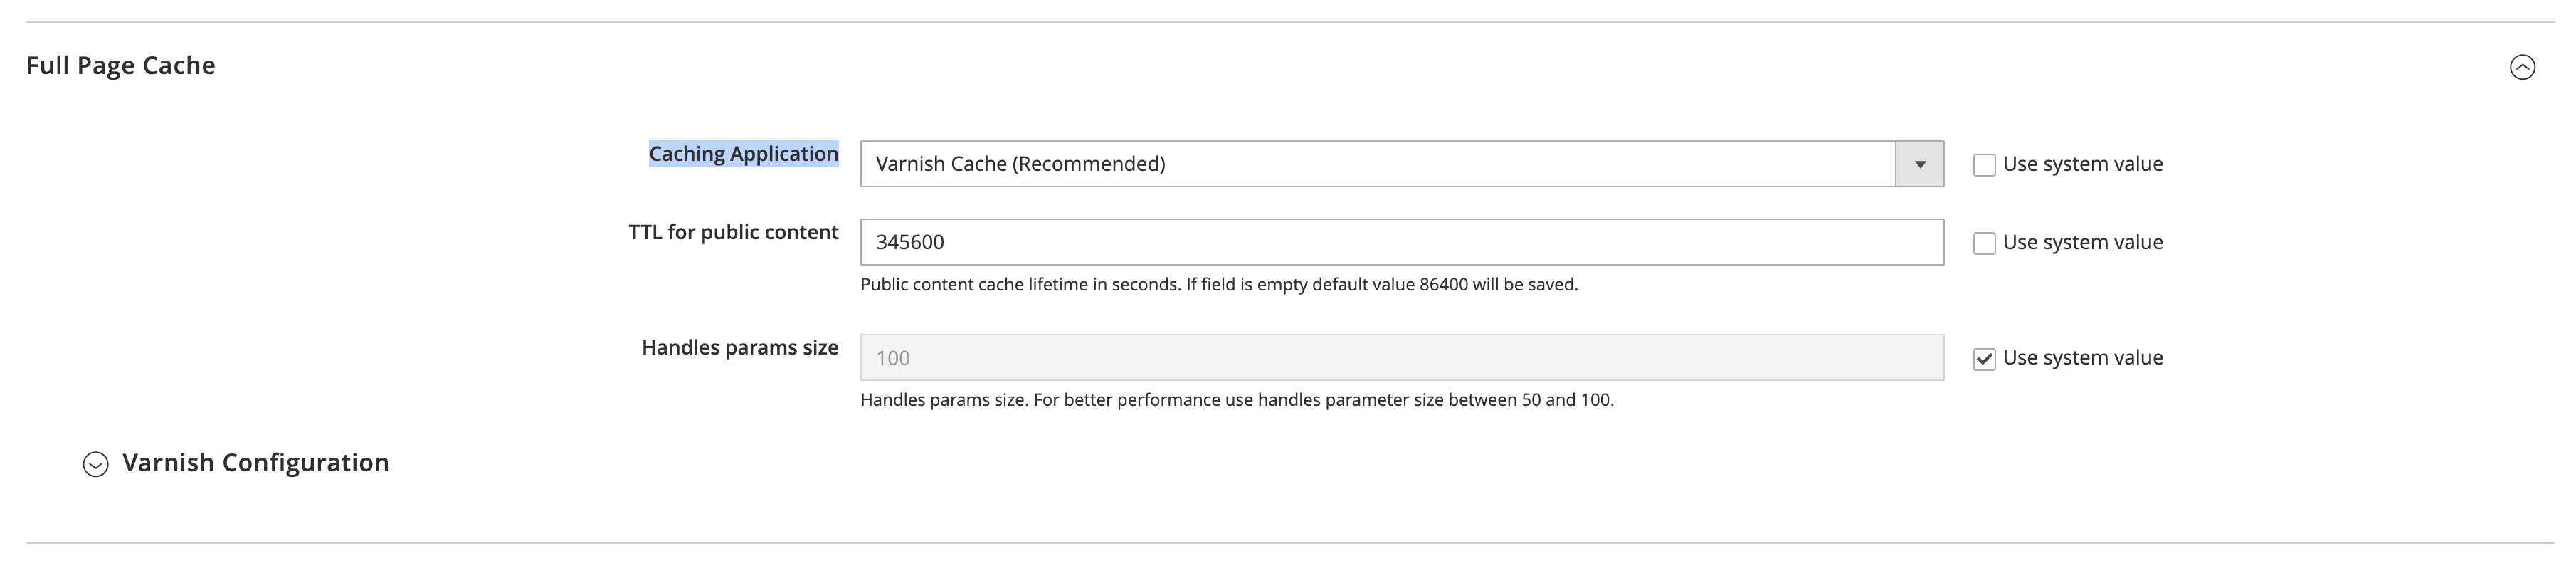
To make Magento 2 use Varnish, Go to Stores > Configuration > Advanced > System > Full Page Cache and set Application to Varnish.
Open the Varnish Configuration tab and download a VCL file for the version you are running.
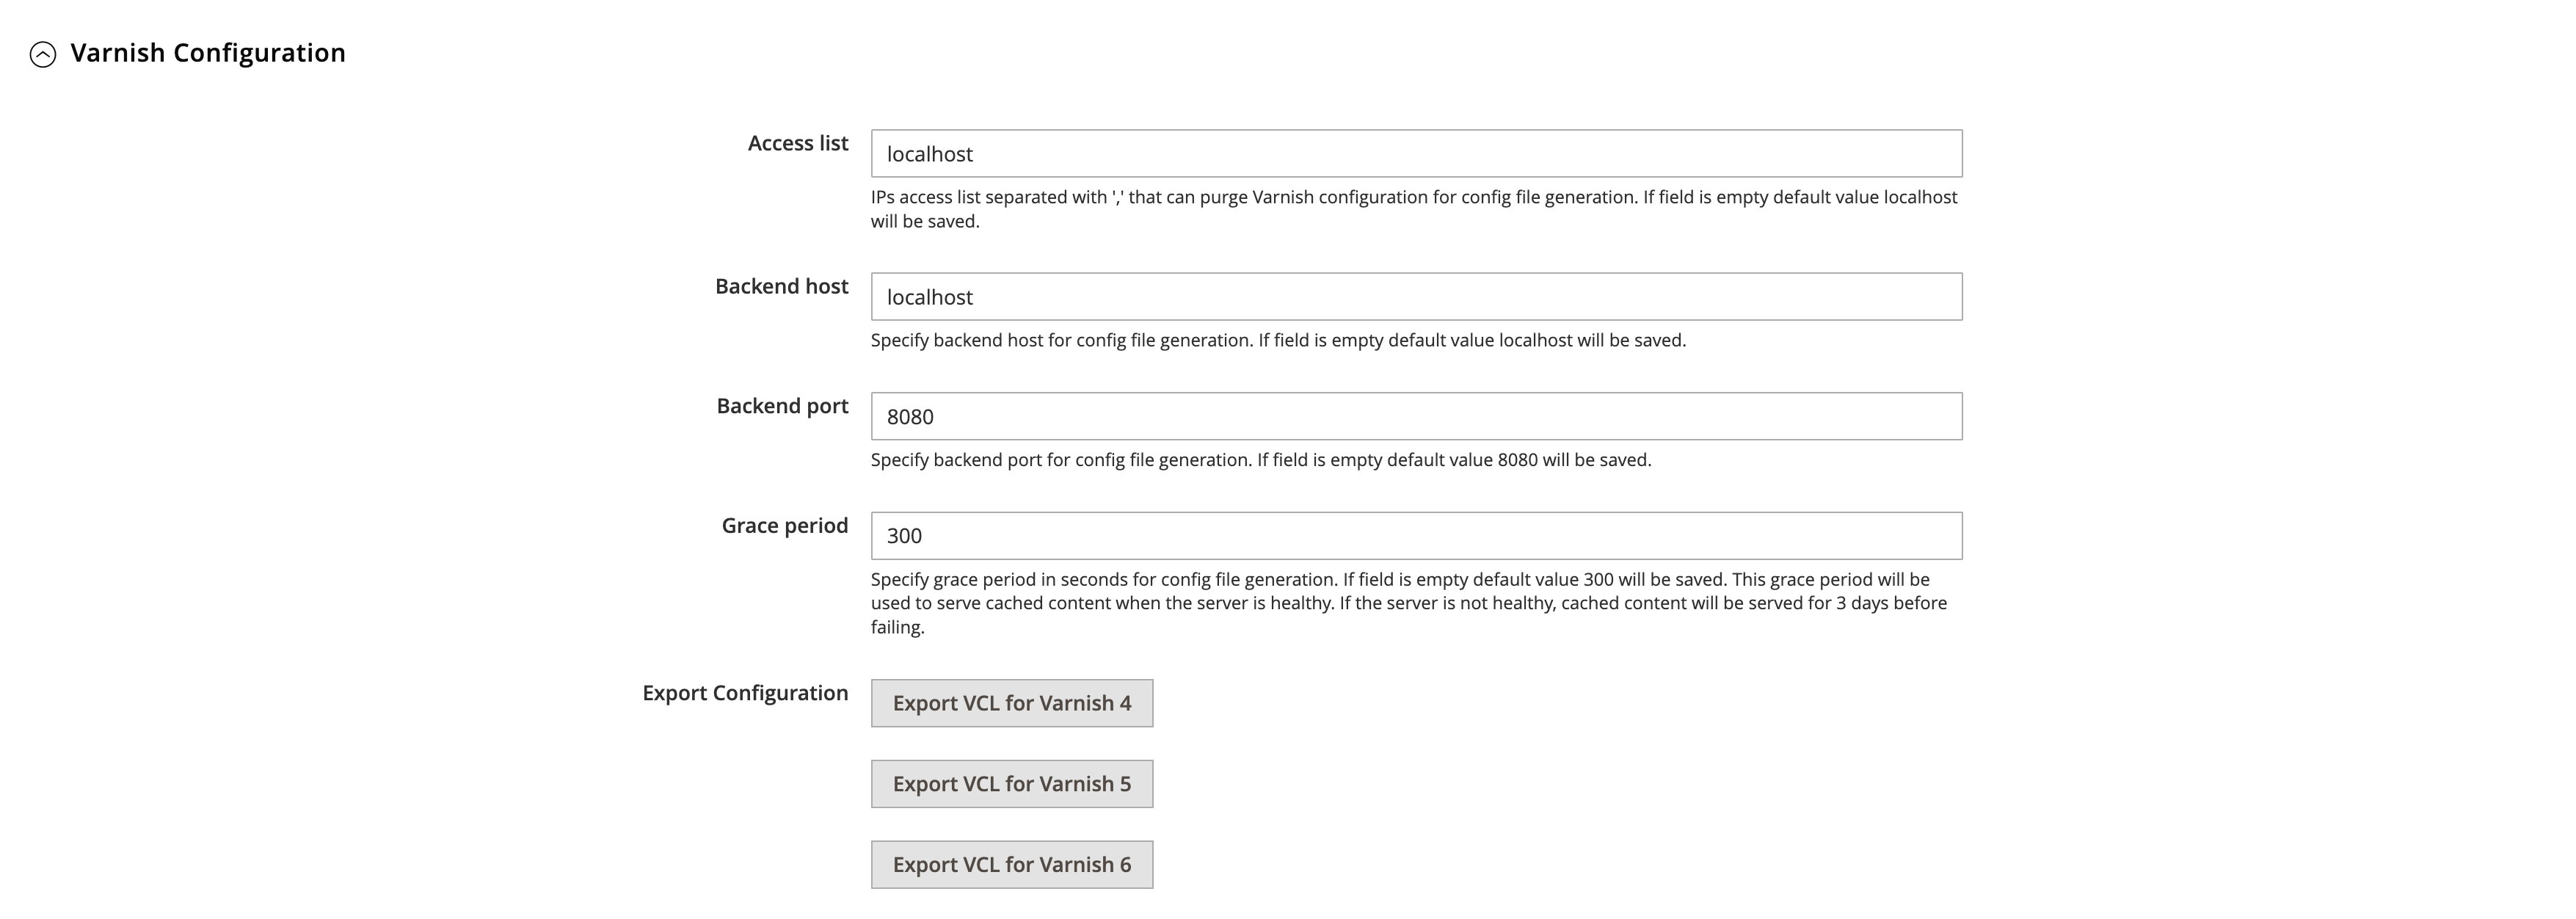
Contact your hosting support team and ask them to install and configure Varnish. Pass them the VCL file you’ve downloaded.
Once installed Varnish will help the web server deal with tons of bot traffic.
4. Use Nginx Web Server and its DDoS Mitigation Features
Nginx is a web server designed and programmed with performance in mind. Its event-driven architecture allows it to absorb huge amounts of traffic with minimal resources.
Different hosting companies use different web servers. You as a client usually don’t choose what server your website will run on.
In cases when you host your Magento store in-house, I’d recommend going with Nginx.
Below are some Nginx DDoS mitigation techniques you can use.
4.1 Limit the Rate of Requests for Particular URL
Nginx can limit the rate of requests for a particular URL from a single IP.
For example, you might want to protect Magento 2 customer/account/login page from brute forcing and DDoSing.
No real user would access the Customer Login area more than 1 time during 2 seconds. Let’s translate it in Nginx configuration:
limit_req_zone $binary_remote_addr zone=login:10m rate=30r/m

server {

   location /customer/account/login {
        limit_req zone=login;
   }

}
4.2 Close Slow Connections
Too many open connections could cause a server to overload and slow down. Magento site that runs on that server would be too slow to respond to client requests.
Nginx can close slow connections and prevent a type of DDoS attacks similar to Slowloris.
Define timeouts for header and body writes:
server {

  client_body_timeout 5s;
  client_header_timeout 5s;

}
If a client waits more than 5s to send headers or body data Nginx closes that connection.
4.3 Limiting the Number of Connections
Nginx allows you to limit the number of active connections an IP can open. It would help to keep Magento running under traffic floods.
For example, let’s limit connections to the checkout area to something reasonable. Let’s set it to 10 for a single IP address:
limit_conn_zone $binary_remote_addr zone=chk:10m


server

    location /checkout {
       limit_conn addr 10
    }

}
5. Rate Limiting in Magento 2.4.7+
Magento 2.4.7+ comes with a new feature - Rate Limiting:
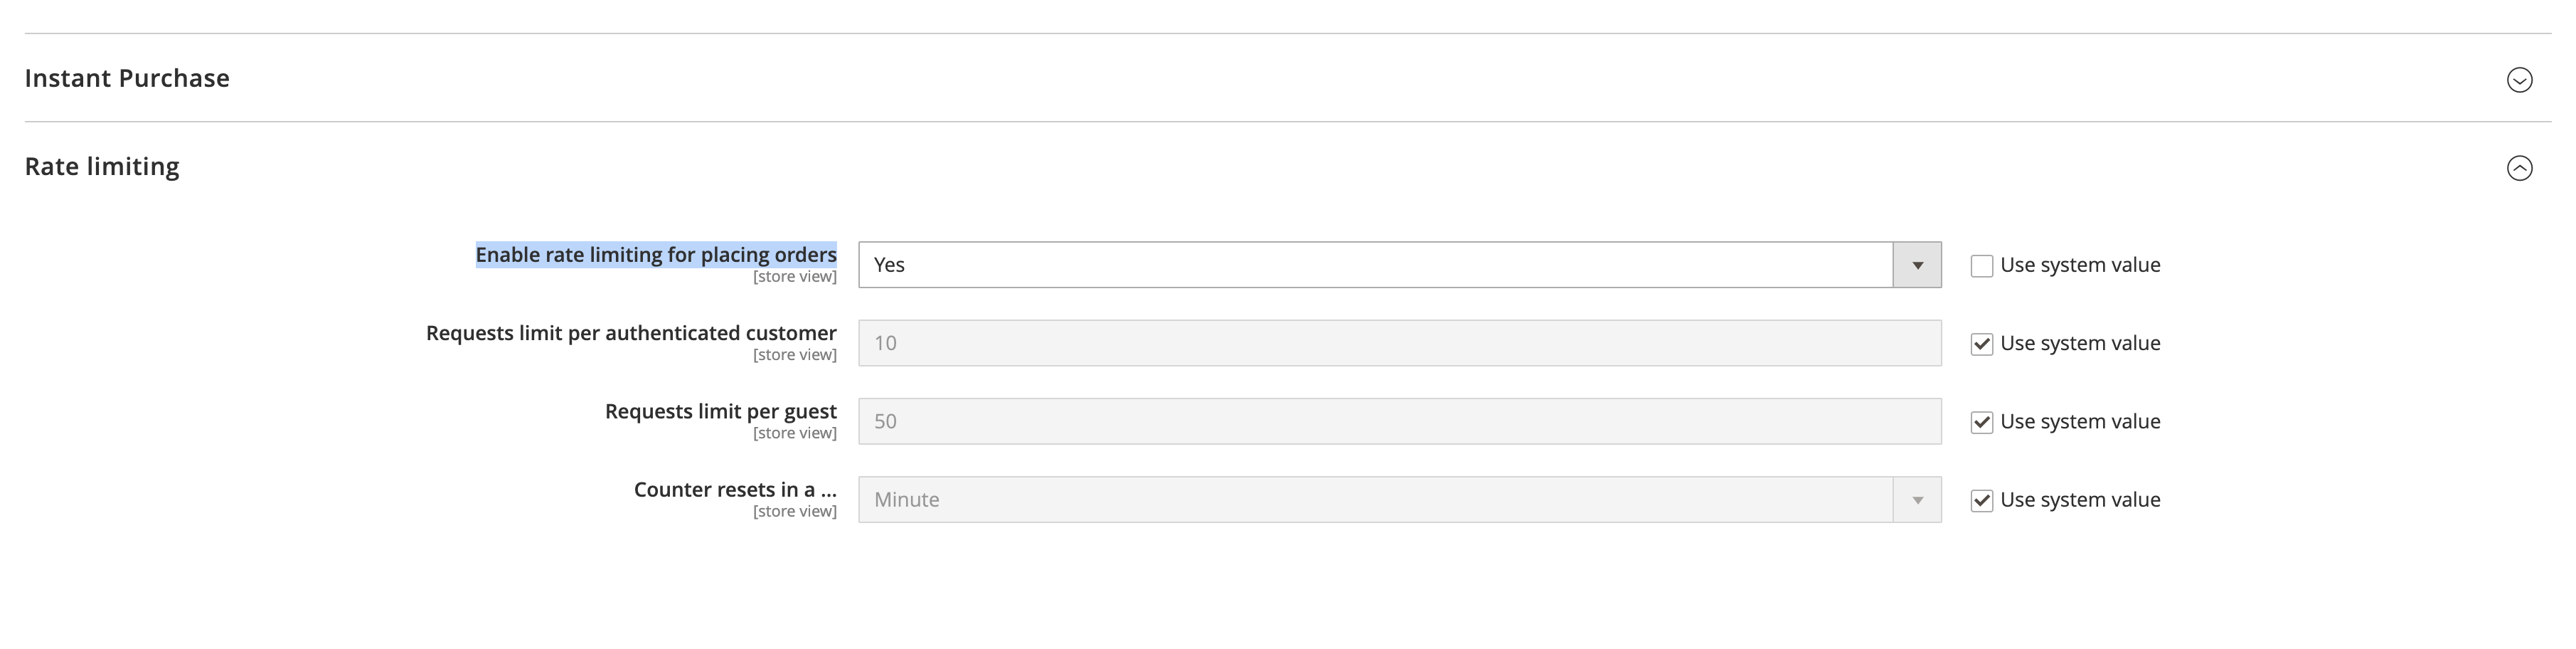
You can now limit the number of orders a single customer could place in a minute (or an hour).
This functionality was added to fight carding attacks as I described here.
But it can also help to fight DDoS attacks. Cybercriminals could try and overload your checkout area with fake orders. Rate Limiting would help to stop them.
To turn it on, go to Stores > Configuration > Sales > Sales > Rating Limiting > Enable Rate Limiting for placing orders > Set to Yes.
You can set the limits for both authenticated customers and guests.
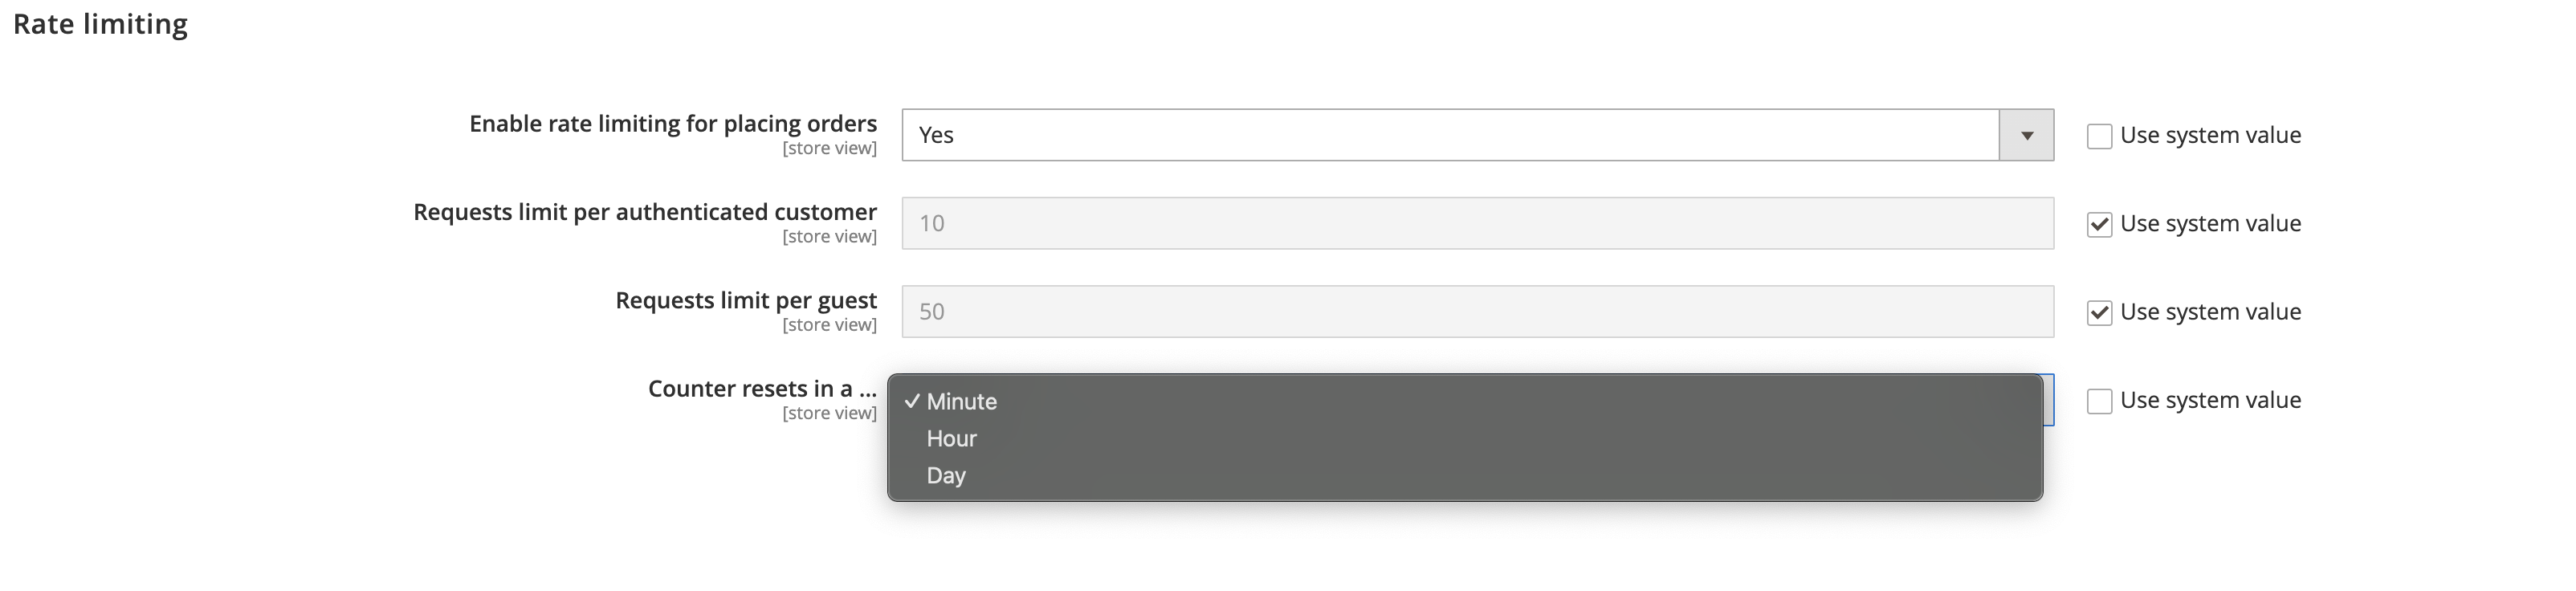
The limits could be reset in Minute, Hour or Day:
6. Disable Guest Checkouts and Turn on Customer Email Confirmation
The checkout is the perfect area to try and DDoS a Magento 2 website. Criminals could use thousands of IPs to perform thousands of checkout attempts.
There is a way to make the life of attackers a little bit harder.
Turn off Guest Checkouts and enable Customer Email Verification. Now in order to DDoS they would need to come up with thousands of valid email addresses and a way to verify them automatically.
And it would be easy to stop the attack, just delete all those abusive customers from the database.
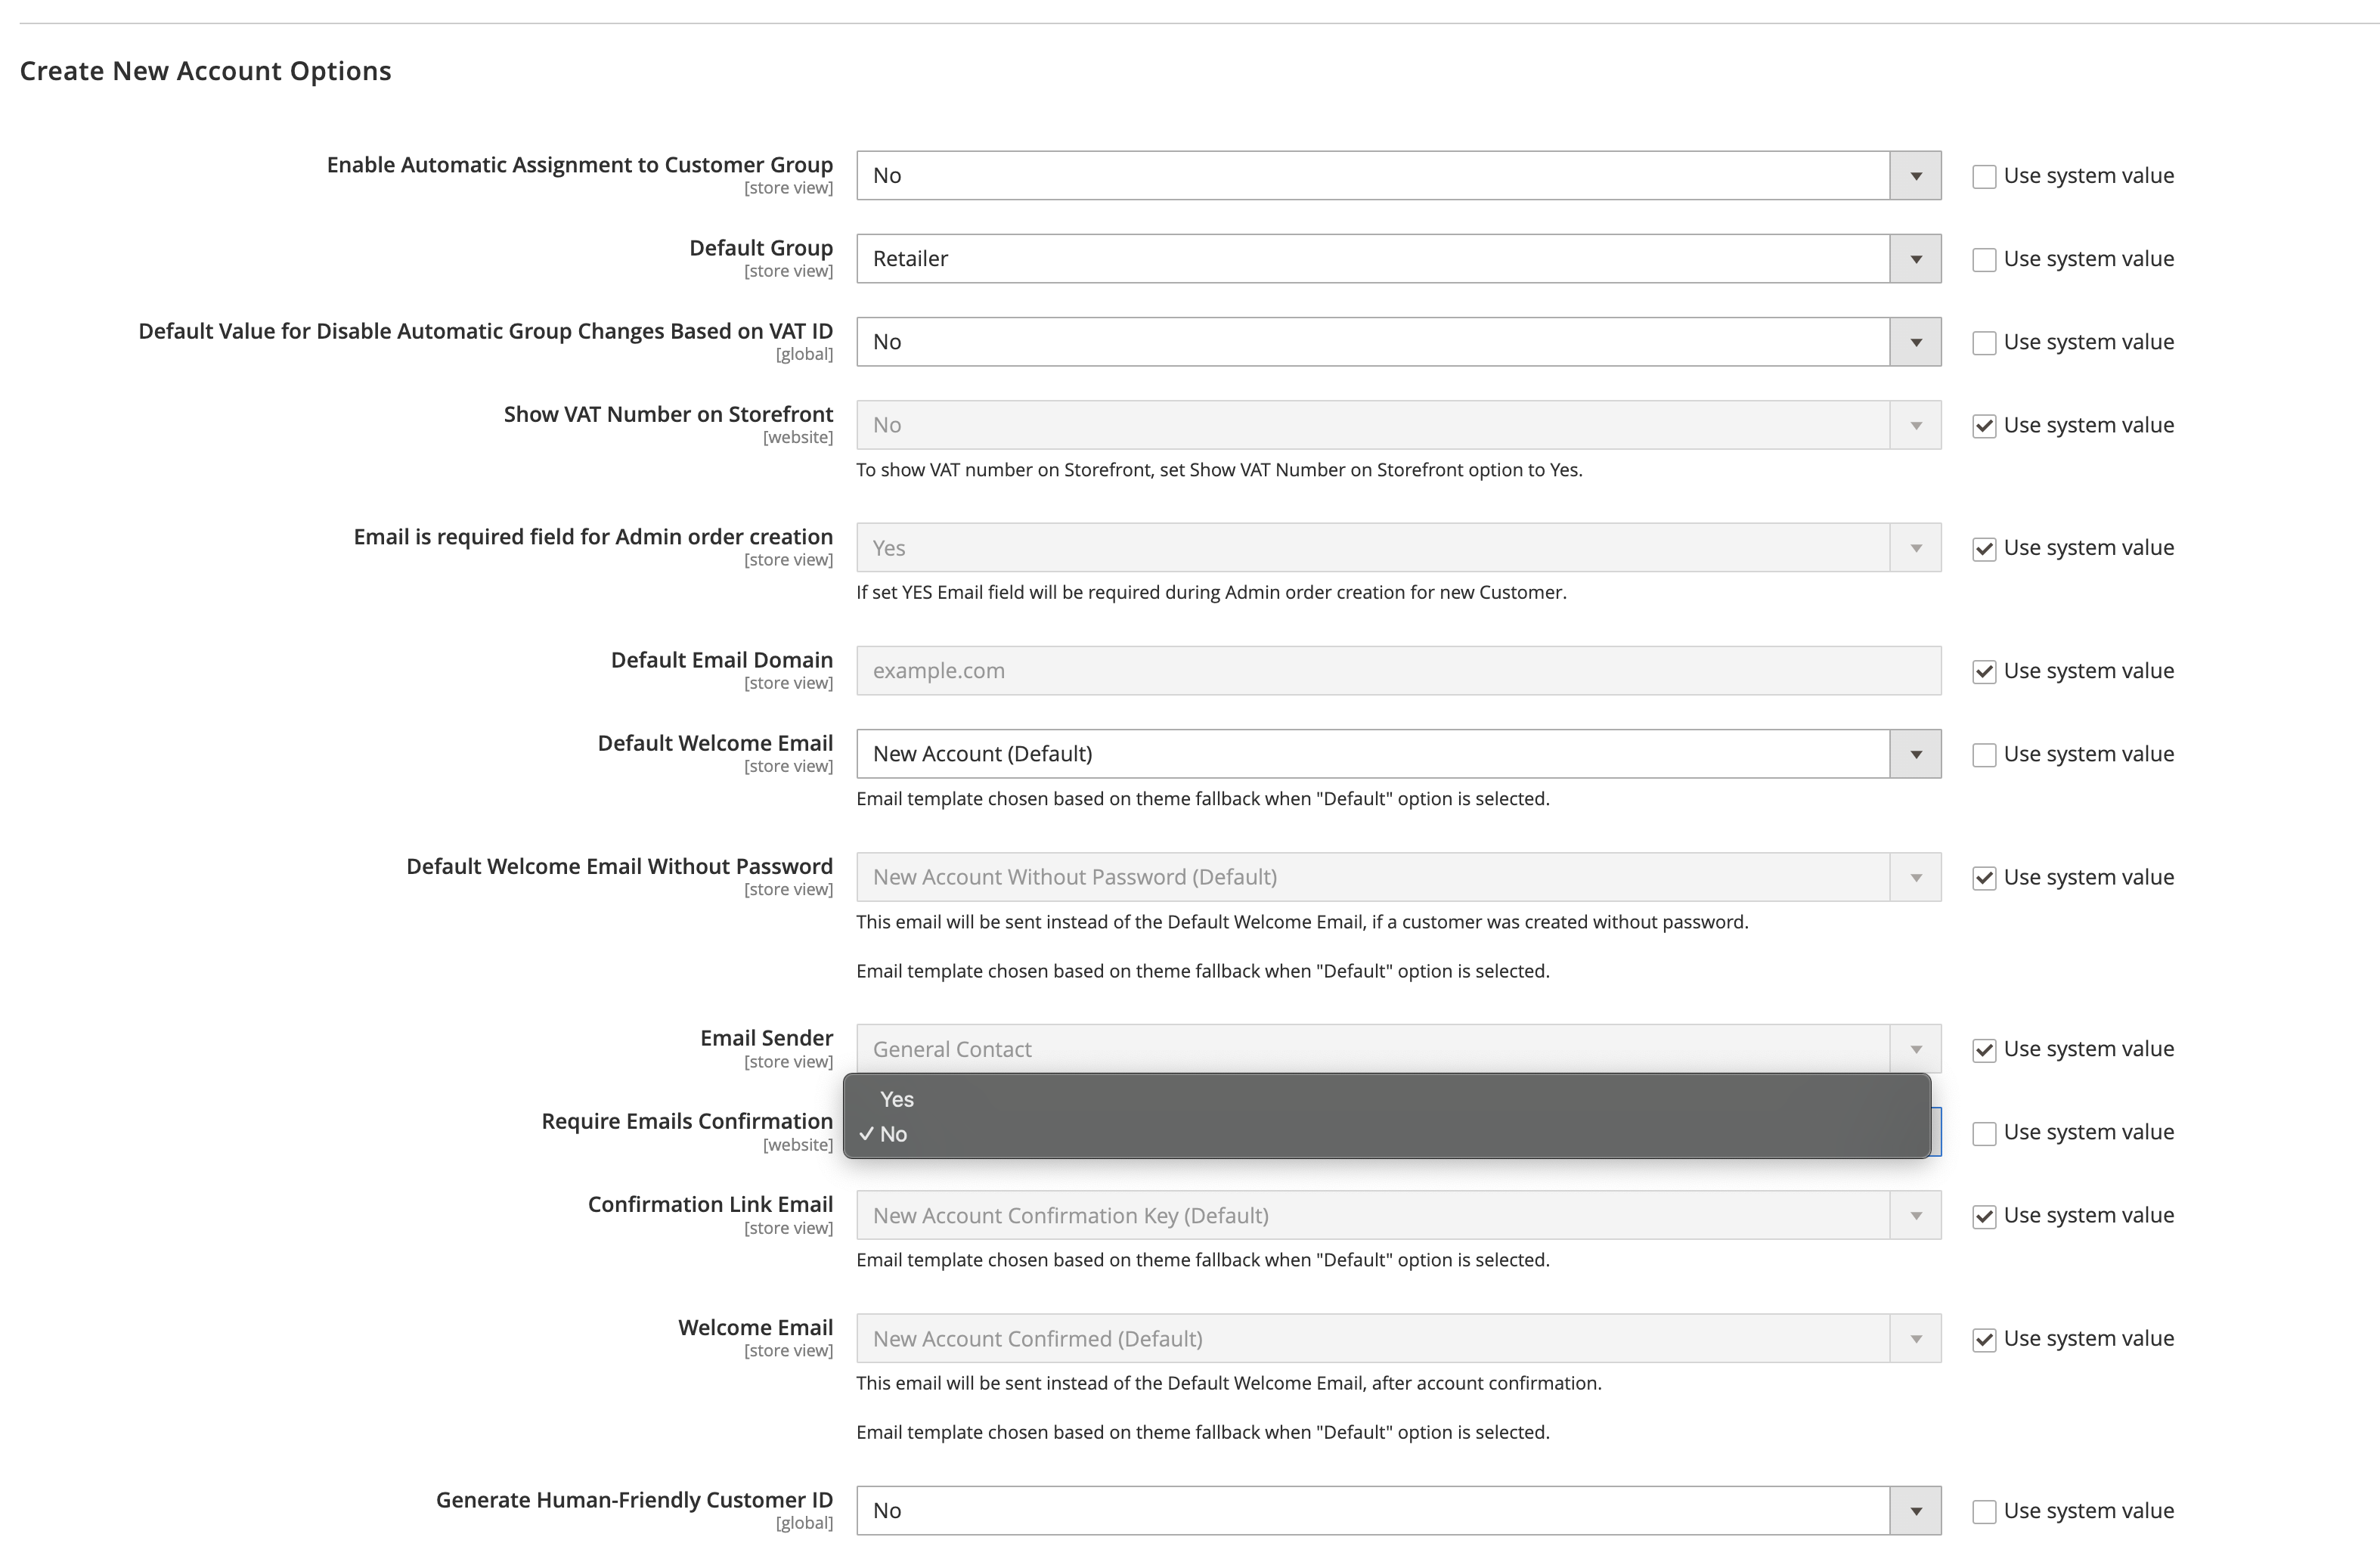
To enable Customer Email Verification, go to Stores > Configuration > Customers > Customer Configuration and turn Require Emails Confirmation to Yes:
To turn off Guest Checkouts, go to Stores > Configuration > Sales > Checkout and set Allow Guest Checkout to No:

These options are available in all versions of Magento 2, you don’t have to run the latest upgrade.
7. Cloudflare DDoS Protection Options
Cloudflare is a popular content delivery network service. It would sit between your server and clients.
Cloudflare has DDoS protection features. Let’s explore them and see how they can protect a Magento 2 website.
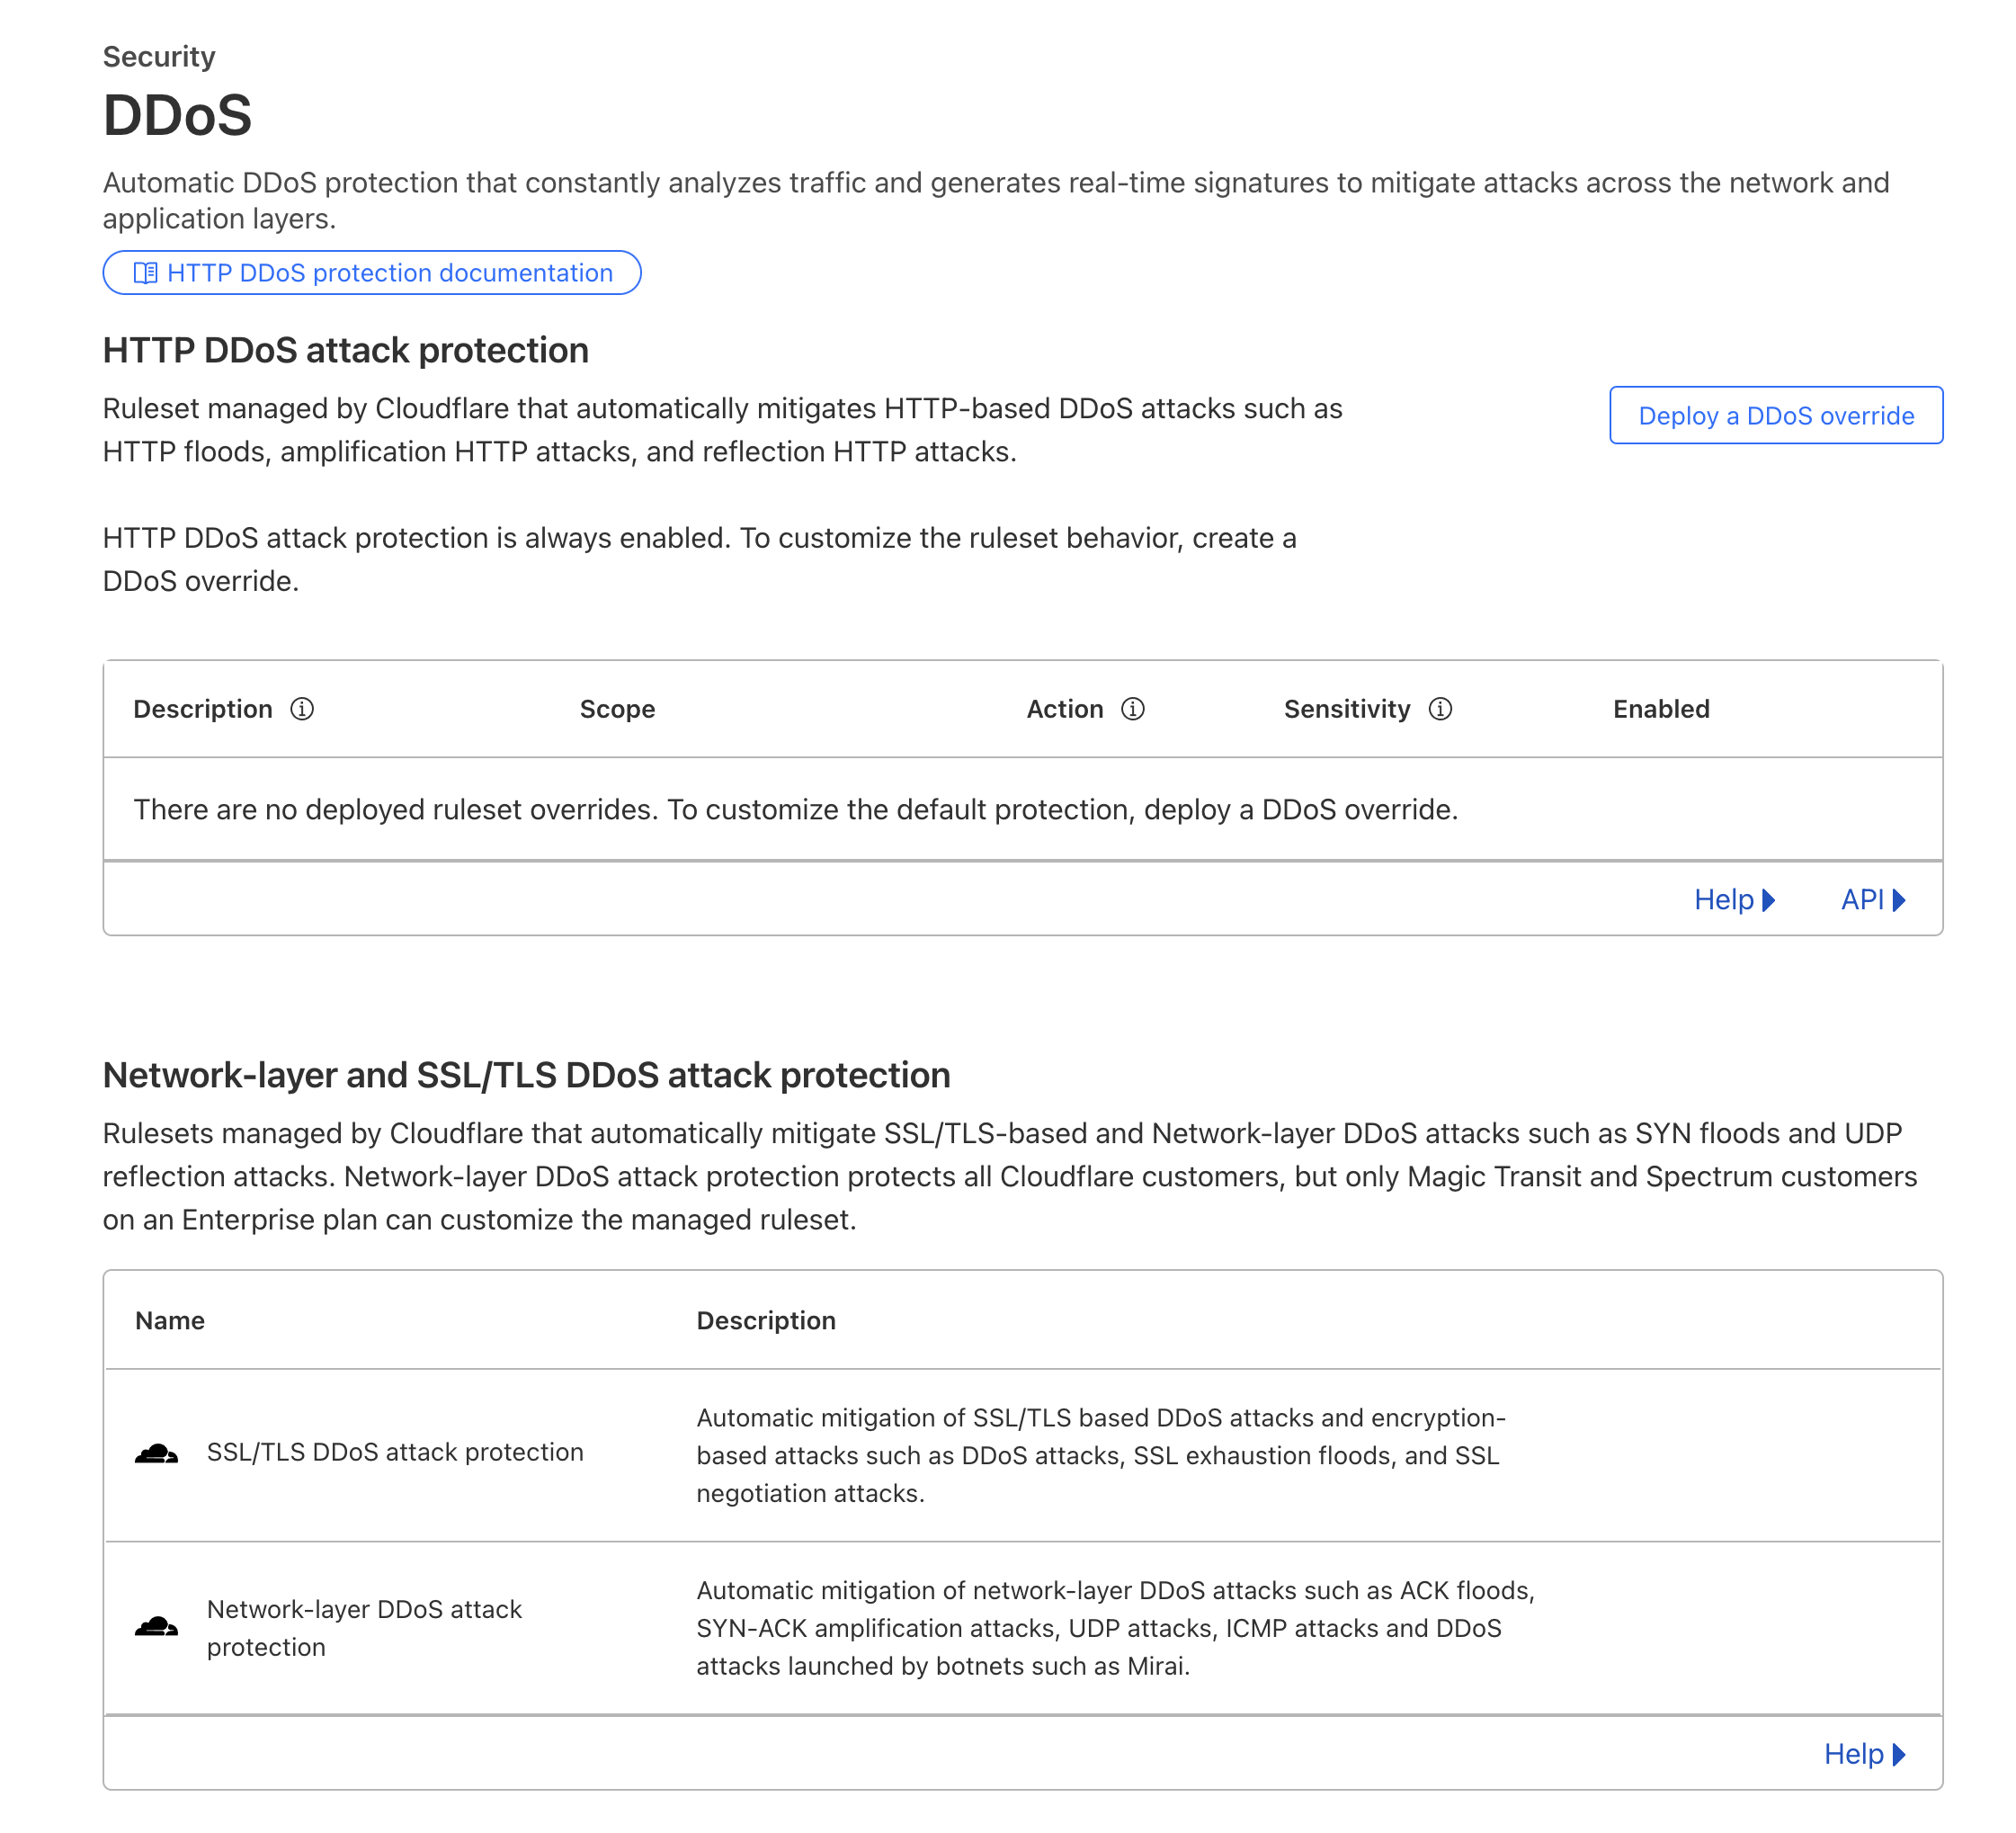
Basic Distributed-Denial-of-Service protection is automatic with Cloudflare. It’s always enabled and it analyzes traffic in real-time.

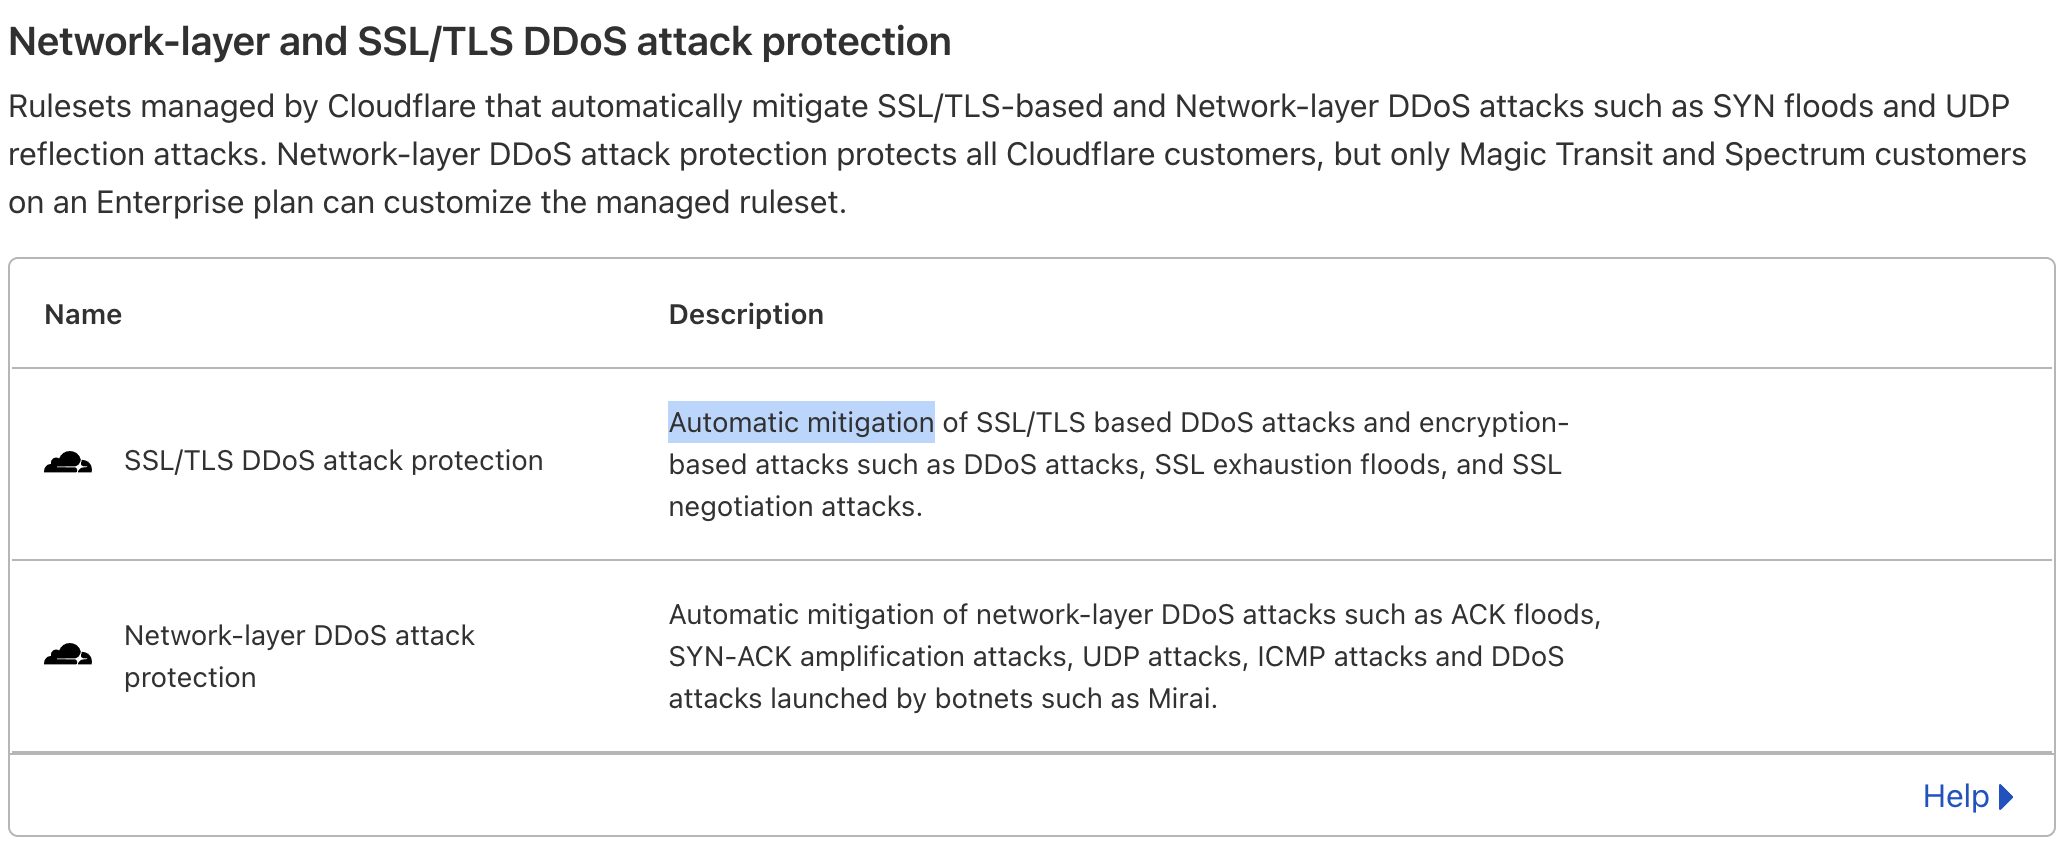
Configuration of Cloudflare doesn’t depend on Magento.
All you would need to do is configure your domain name to point to Cloudflare servers. Then the servers would route traffic back to Magento.
Takeaway
Denial of service attacks could cause loss of sales and a legitimate traffic decline.
It’s important to take pro-active steps to prevent cybercriminals from DDoS your online shop.
Here is what I’d recommend to prepare for a bot traffic flood:
- Install and setup Fail2Ban
- Get server overload instant notifications
- Use Varnish for low TTFB
- Use Nginx DDoS prevention features
- Magento 2.4.7+ Rate Limiting
- Force users to register before checking out and ask to confirm email addresses
- Explore Cloudflare protection against bot traffic
Find this article useful? Share it on LinkedIn with your professional network, spread the knowledge!
If you find this post interesting do not hesitate to sign up for our newsletter and join the 1007 people who receive Magento news, tips and tricks regularly.
Thank You!