
PCI (Payment Card Industry) security standards aim to protect credit/debit cardholder data.
It has 6 main goals:
And 12 main requirements:
I will show you 5 simple ways to make a Magento 2 (Adobe Commerce) PCI compliant. Read till the end to see a bonus tip.
1. Apply The Latest Magento 2 Security Patches

Always run the latest version of the ecommerce platform. It will keep hackers and scammers away.
Adobe Commerce has a release schedule and you might need to follow it to stay up to date.
Try to install a new patch as soon as it’s released to stay on the safe side.
All Magento versions have lifecycle policy and specific end of software update dates. You can check them here.
Upgrade to the latest version when your current version reaches end of life. You will take advantage of the latest PHP, ElasticSearch and database server updates.
If you need help with upgrades - do not hesitate to contact me for help.
There is also a helpful tutorial on how to upgrade Magento 2 - check it out!
2. Choose a Reliable Hosting Company

A well secured server plays an important role in PCI compliance. You need to make sure your site is protected by firewall and antivirus software.
Some site owners prefer to administer their server themselves. You can rent a virtual (or a dedicated) server, set up and maintain it.
It would cost only a fraction of what you’d pay a hosting provider for the same resources.
But I would recommend signing up with a company to provide a running server for you.
They will take care of upgrades, complex configuration and routine maintenance. They would do a better job of keeping your site online.
They have experience of administering many different servers for many clients.
Some hosting companies specialize in Magento 2 platforms. I’d check them out first.
I’d also ask if they have minimal Magento 2 coding knowledge. You’d thank a support team being able to fix 90% of minor website issues.
3. Create Restricted User Roles
You don’t give site backend users access to things they don’t need. That’s one of the main rules of being PCI compliant.
Never grant full access to regular users.
Create several user roles for different tasks your site administrators do.
For example, you have a person that updates product descriptions. He doesn’t need access to site configuration nor to sales/customers overview.
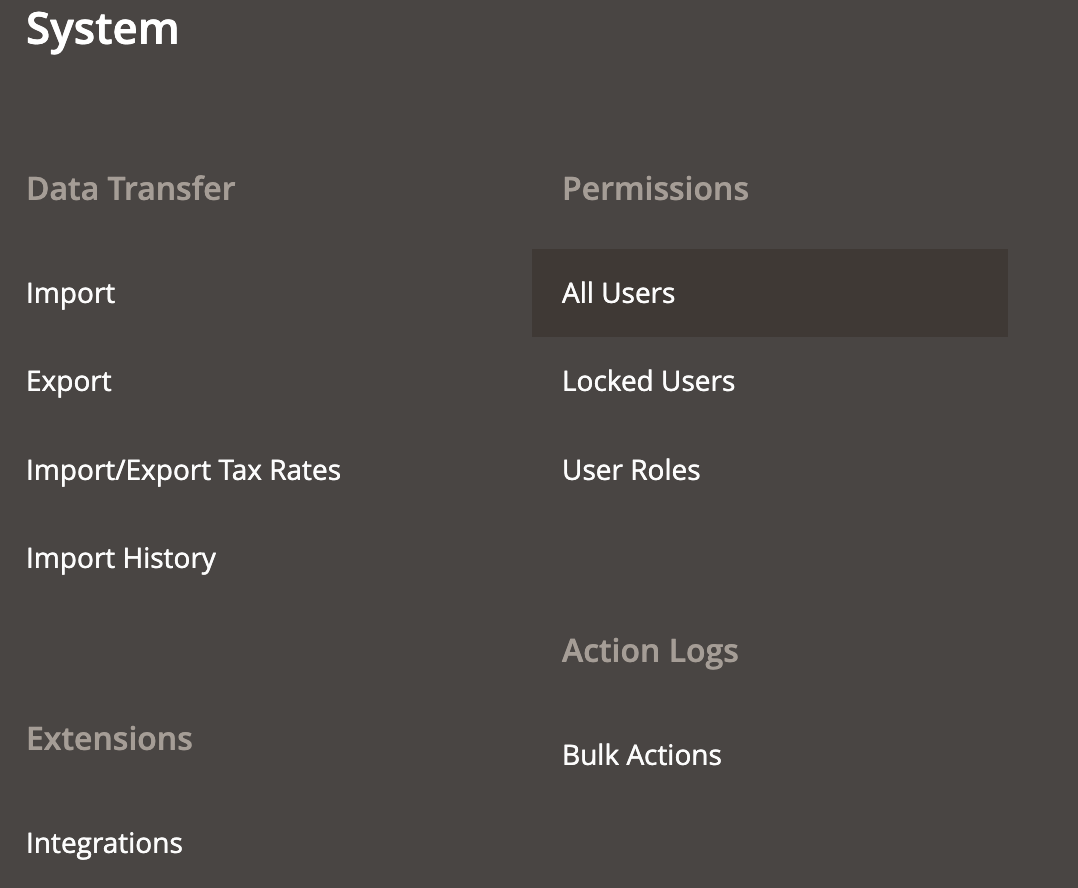
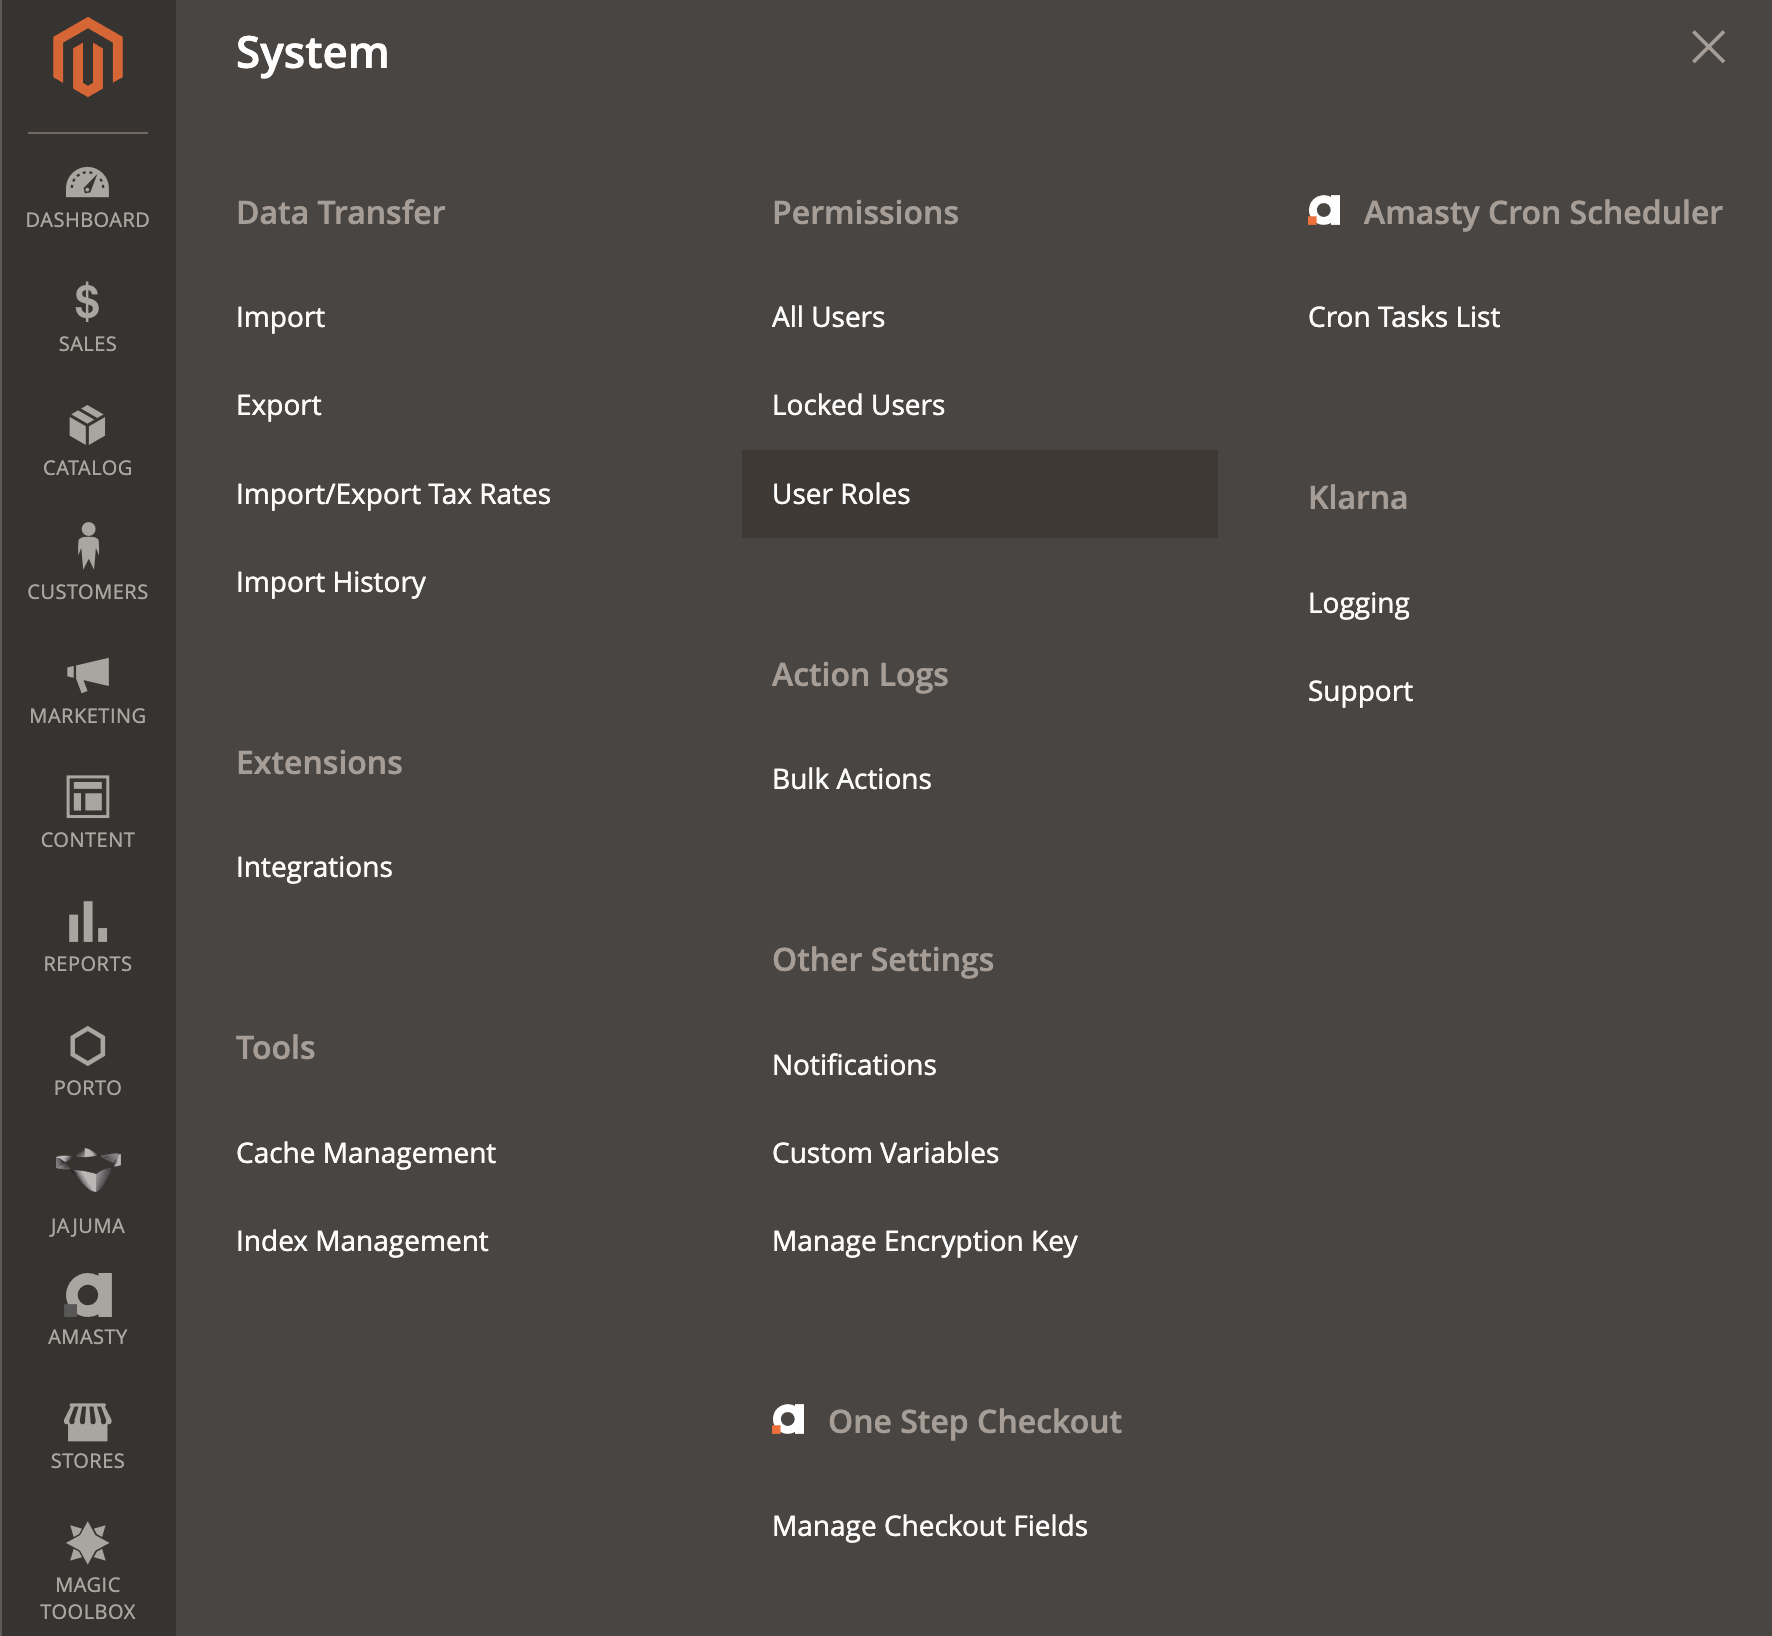
Create a special Editor Role. Go to Systems > Permissions > User Roles:
Click on Add New Role. Under Role Access select Custom:
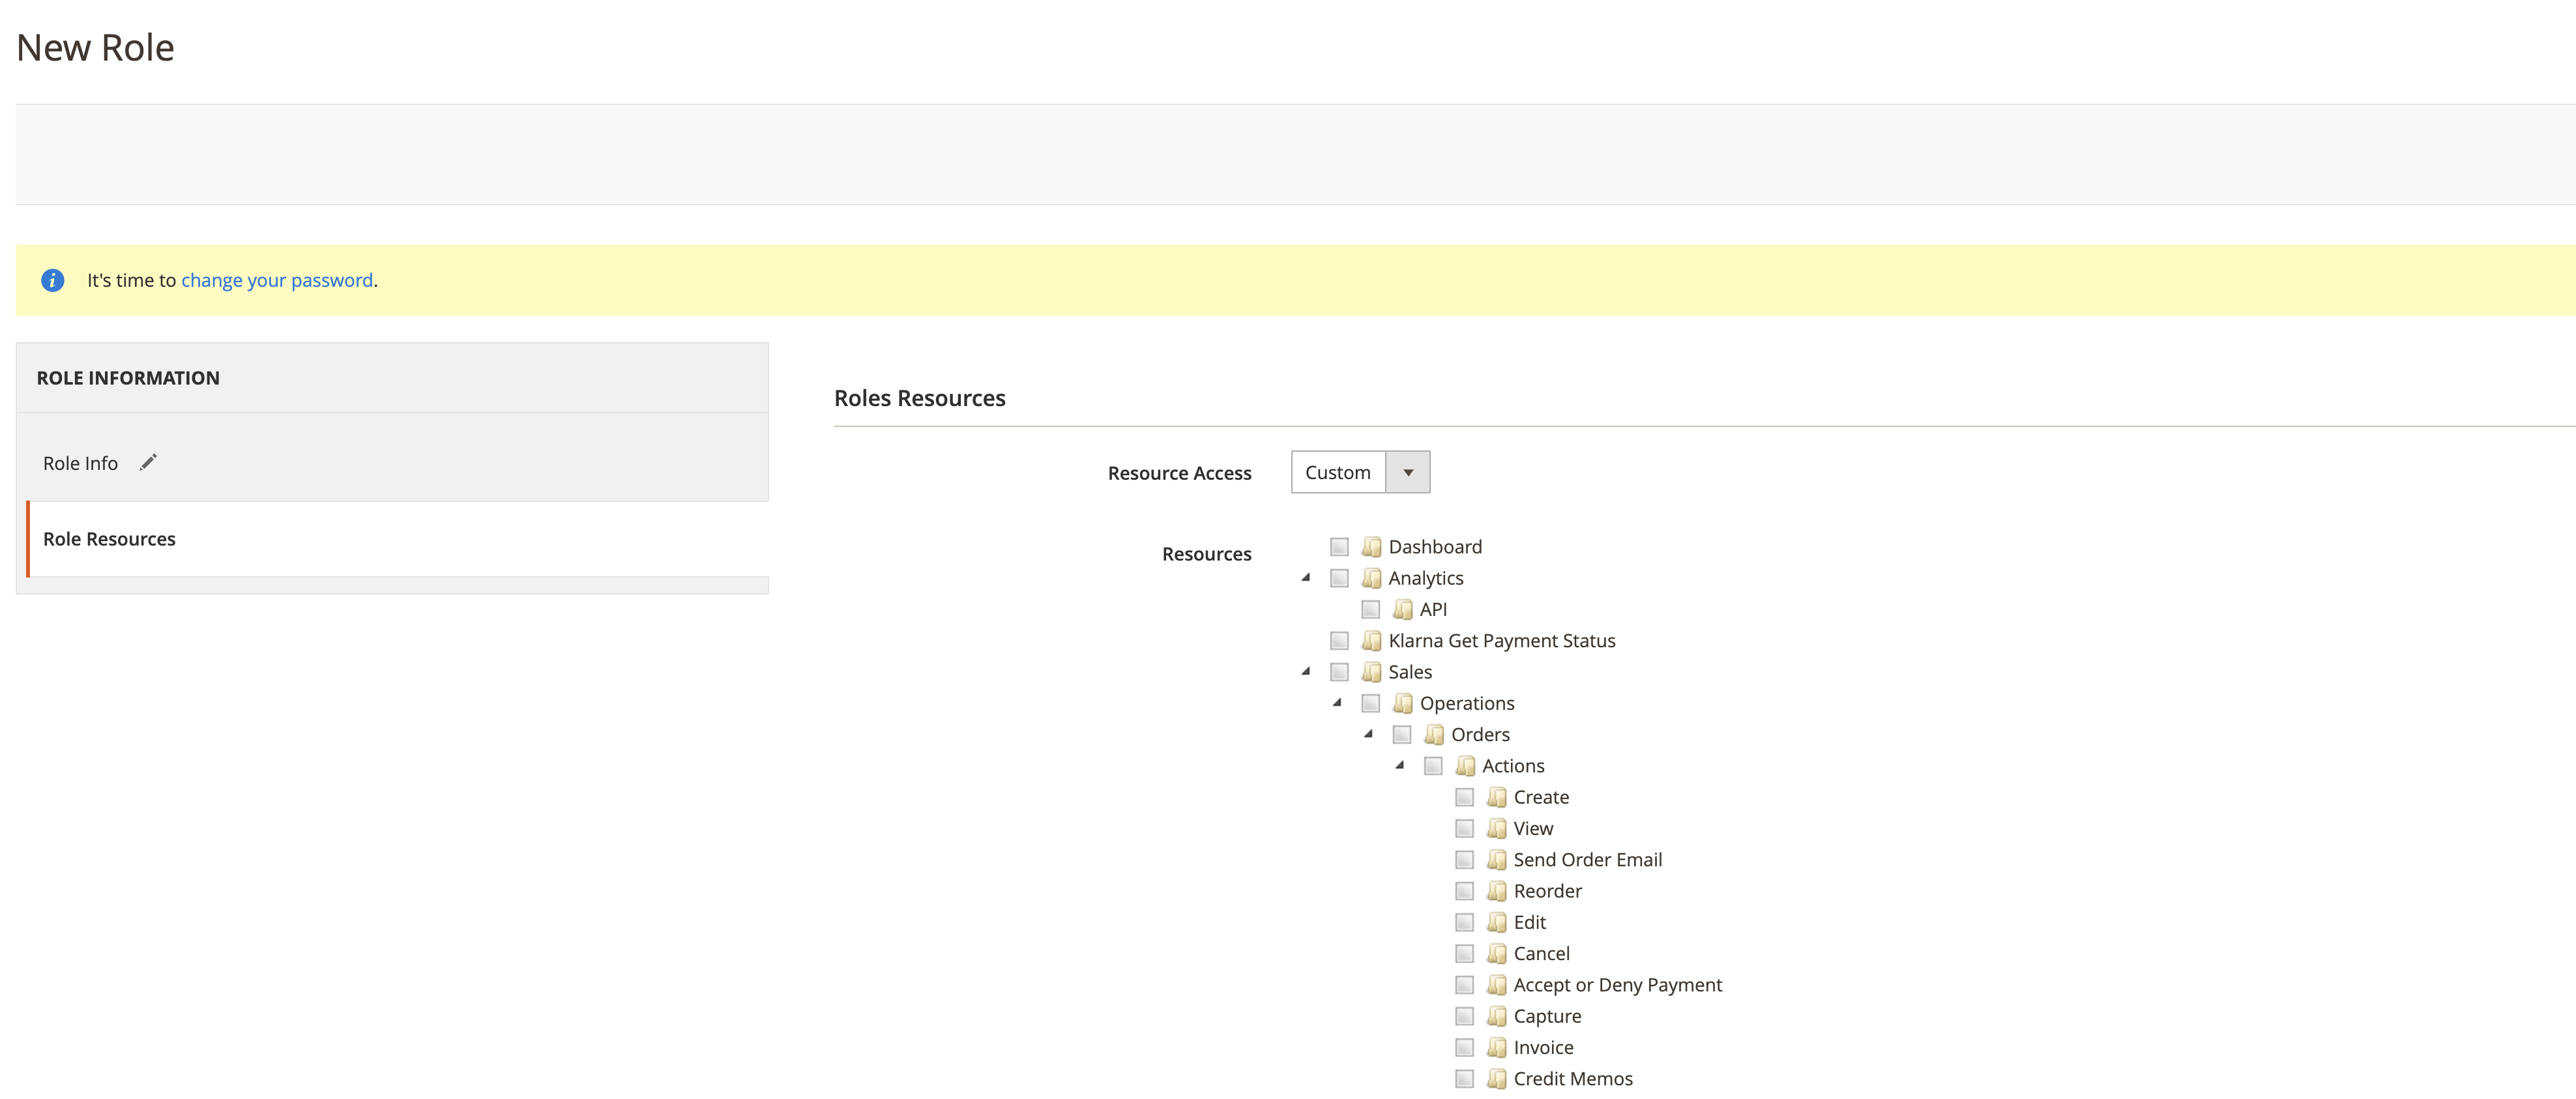
You need to grant a product edit privilege only. To do so, Select Products under Catalog > Inventory:

That way the user can edit products but can’t see/edit anything else.
One more thing. If you have backend 2FA turned on, you need to allow the new role to authenticate. Select Two Factor Auth under Permissions section:

4. Turn Backend 2FA On
Magento 2 has a two-factor authentication (2FA) feature for the admin panel.
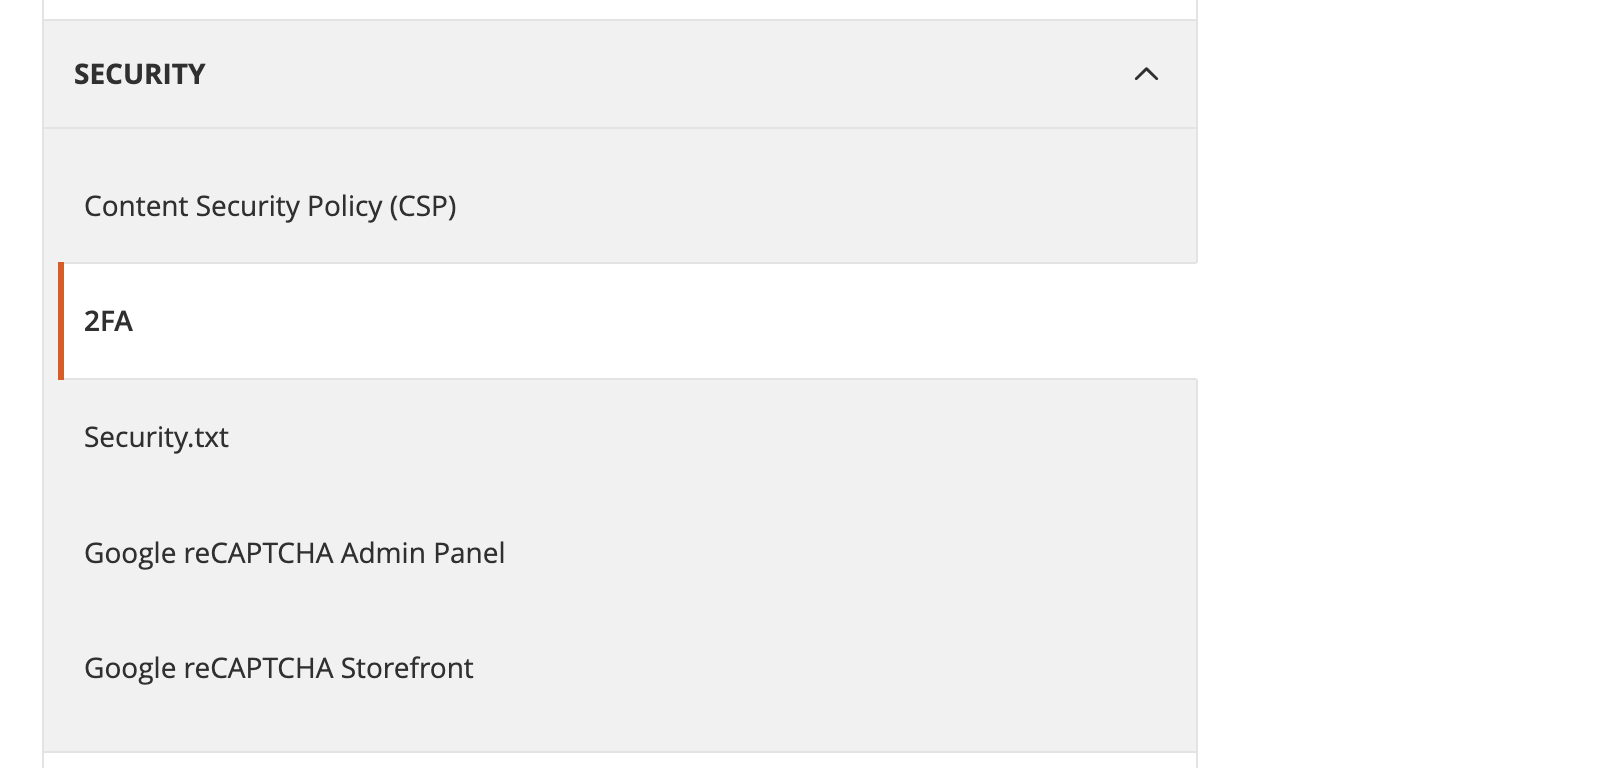
You can turn it on for all backend users at Stores > Configuration > Security > 2FA:
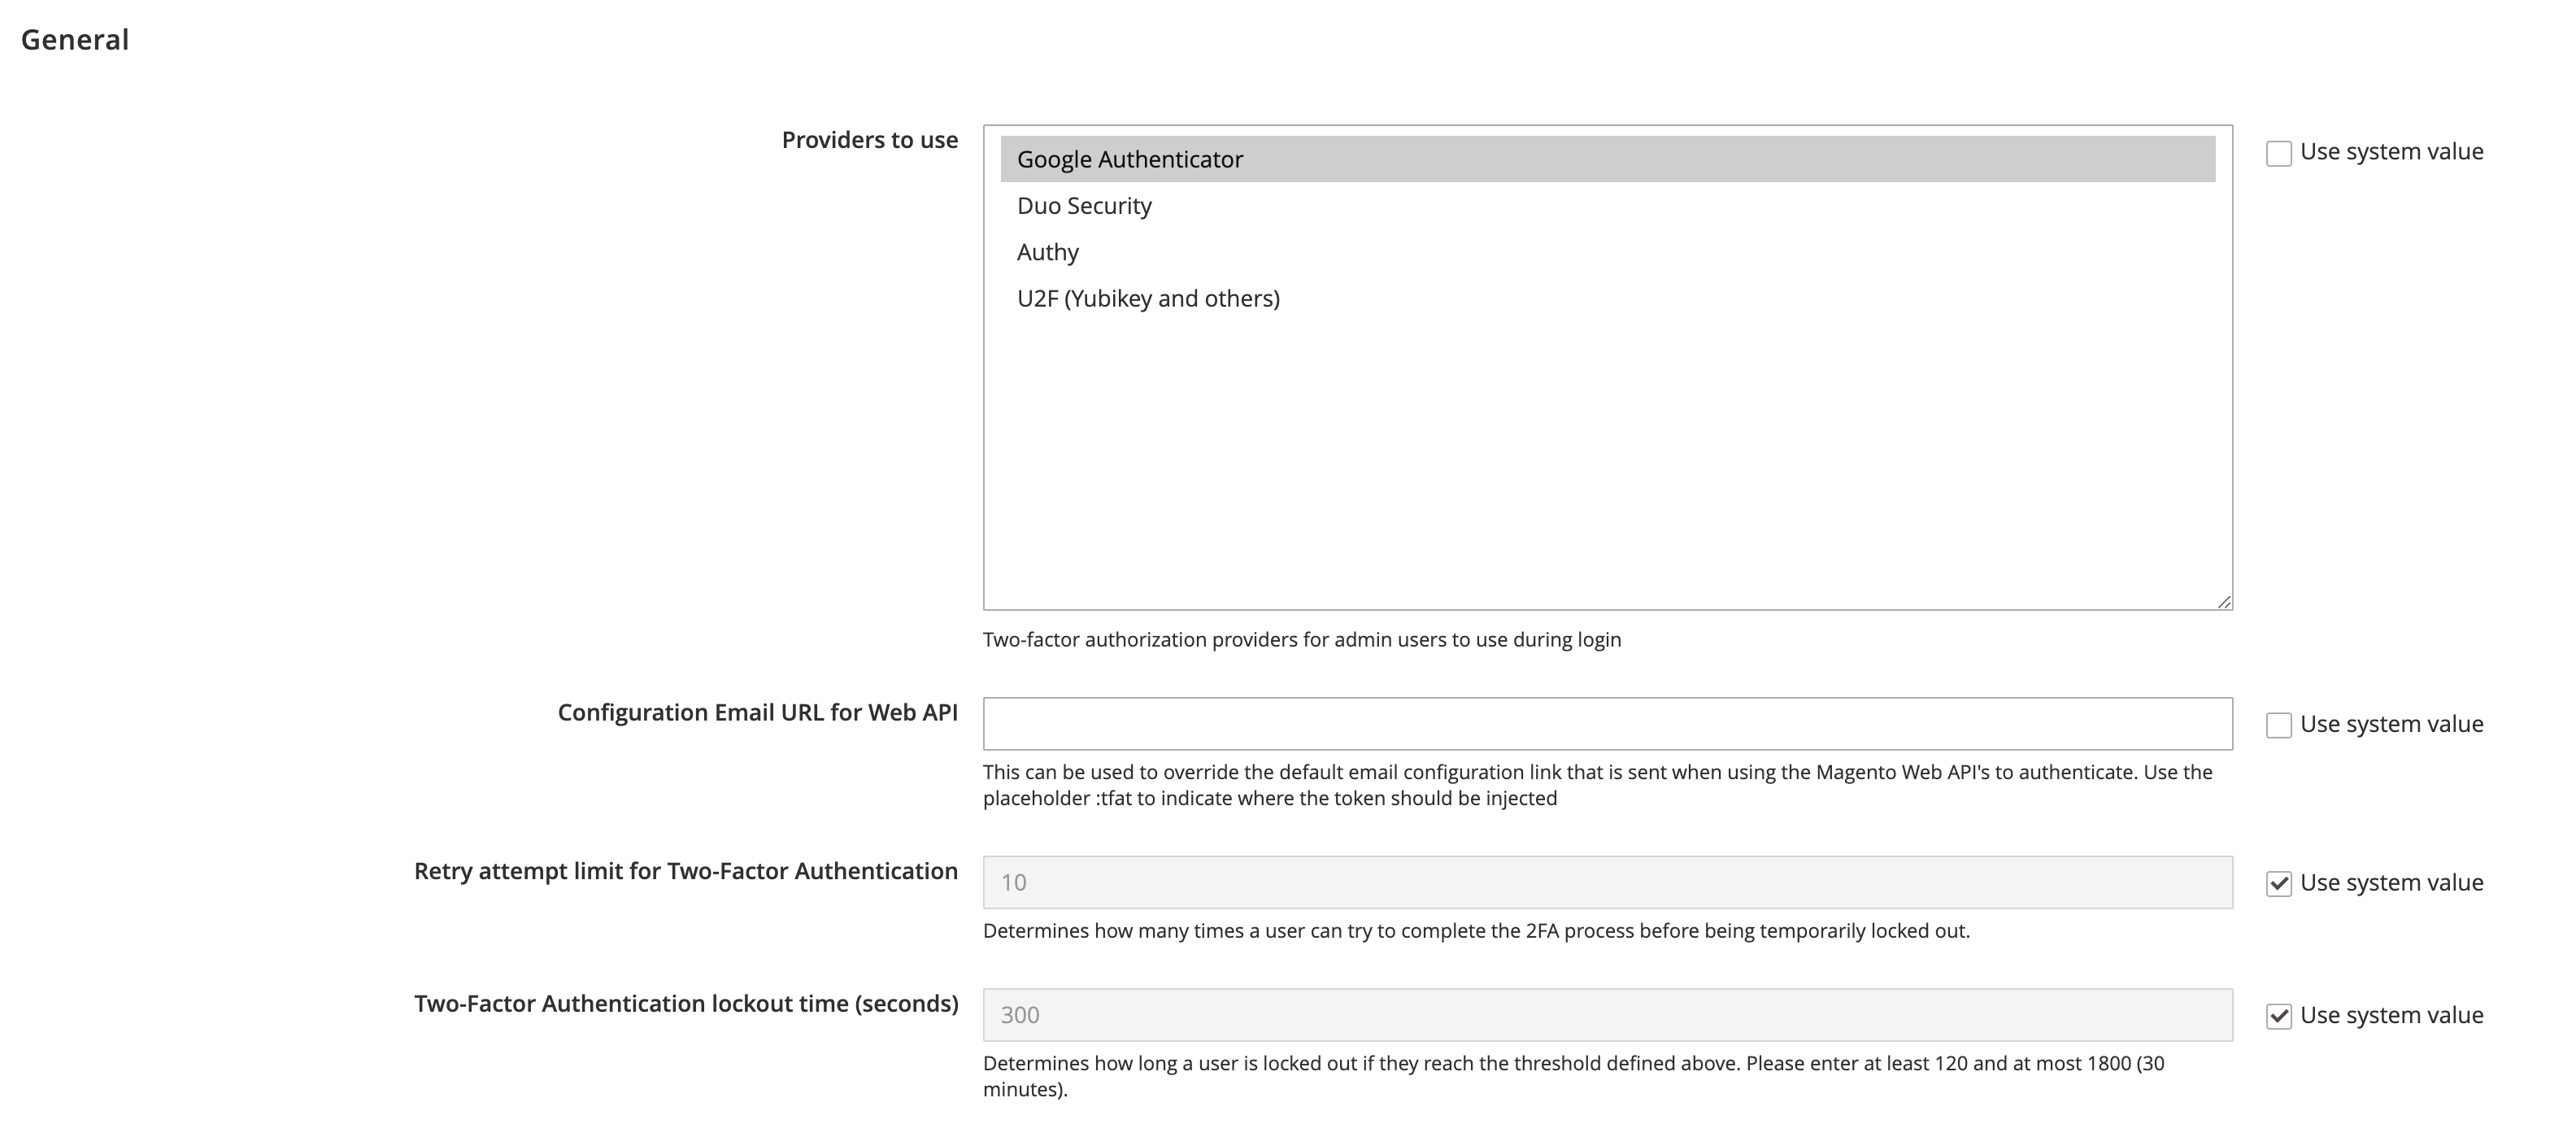
I recommend keeping it on at all times.
Why is 2FA useful?
Two things.
Number 1 - it makes it harder for a nonauthorized user to get to the backend. You prevent hack attempts as most bug exploits need admin access.
Number 2 - you make backend data more secure. Now even if an admin password is compromised, it requires a special code to login.
5. Put in Place Code Monitoring with Git
Git is a popular version control system that tracks code changes. You can use it to your advantage to see if any unwanted changes have been made.
Ask your hosting team to install Git. Create a new repository inside Magento 2 codebase:
cd /path/to/magento2/root/folder
git init .
Then you need to exclude certain file folders from tracking. Git uses a special file .gitignore to set what paths are ignored.
Magento 2 already comes with a .gitignore file:
….
/pub/media/attribute/*
!/pub/media/attribute/.htaccess
/pub/media/analytics/*
/pub/media/catalog/*
!/pub/media/catalog/.htaccess
/pub/media/customer/*
…..
The only change I’d recommend is to make vendor and pub/static folders trackable. Changes to files in these folders can put a website at risk.
You need to remove the following lines:
-/pub/static/*
-!/pub/static/.htaccess
-vendor/*
Now issue:
git add .
git commit -m “initial commit”
...to save the current codebase.
To see what’s been changed, run the following:
git status
To automate the process, make cron pull git statuses daily and email you the results:
0 0 * * * cd /path/to/magento2/root/folder && git status | mail -s ‘Codebase Status’ your@email
You can now be alerted of any changes made to your Adobe Commerce (Magento 2) site code files.
Bonus Tip: Track Payment Page HTML
The majority of malware gets placed on payment pages. It is where clients enter credit card information.
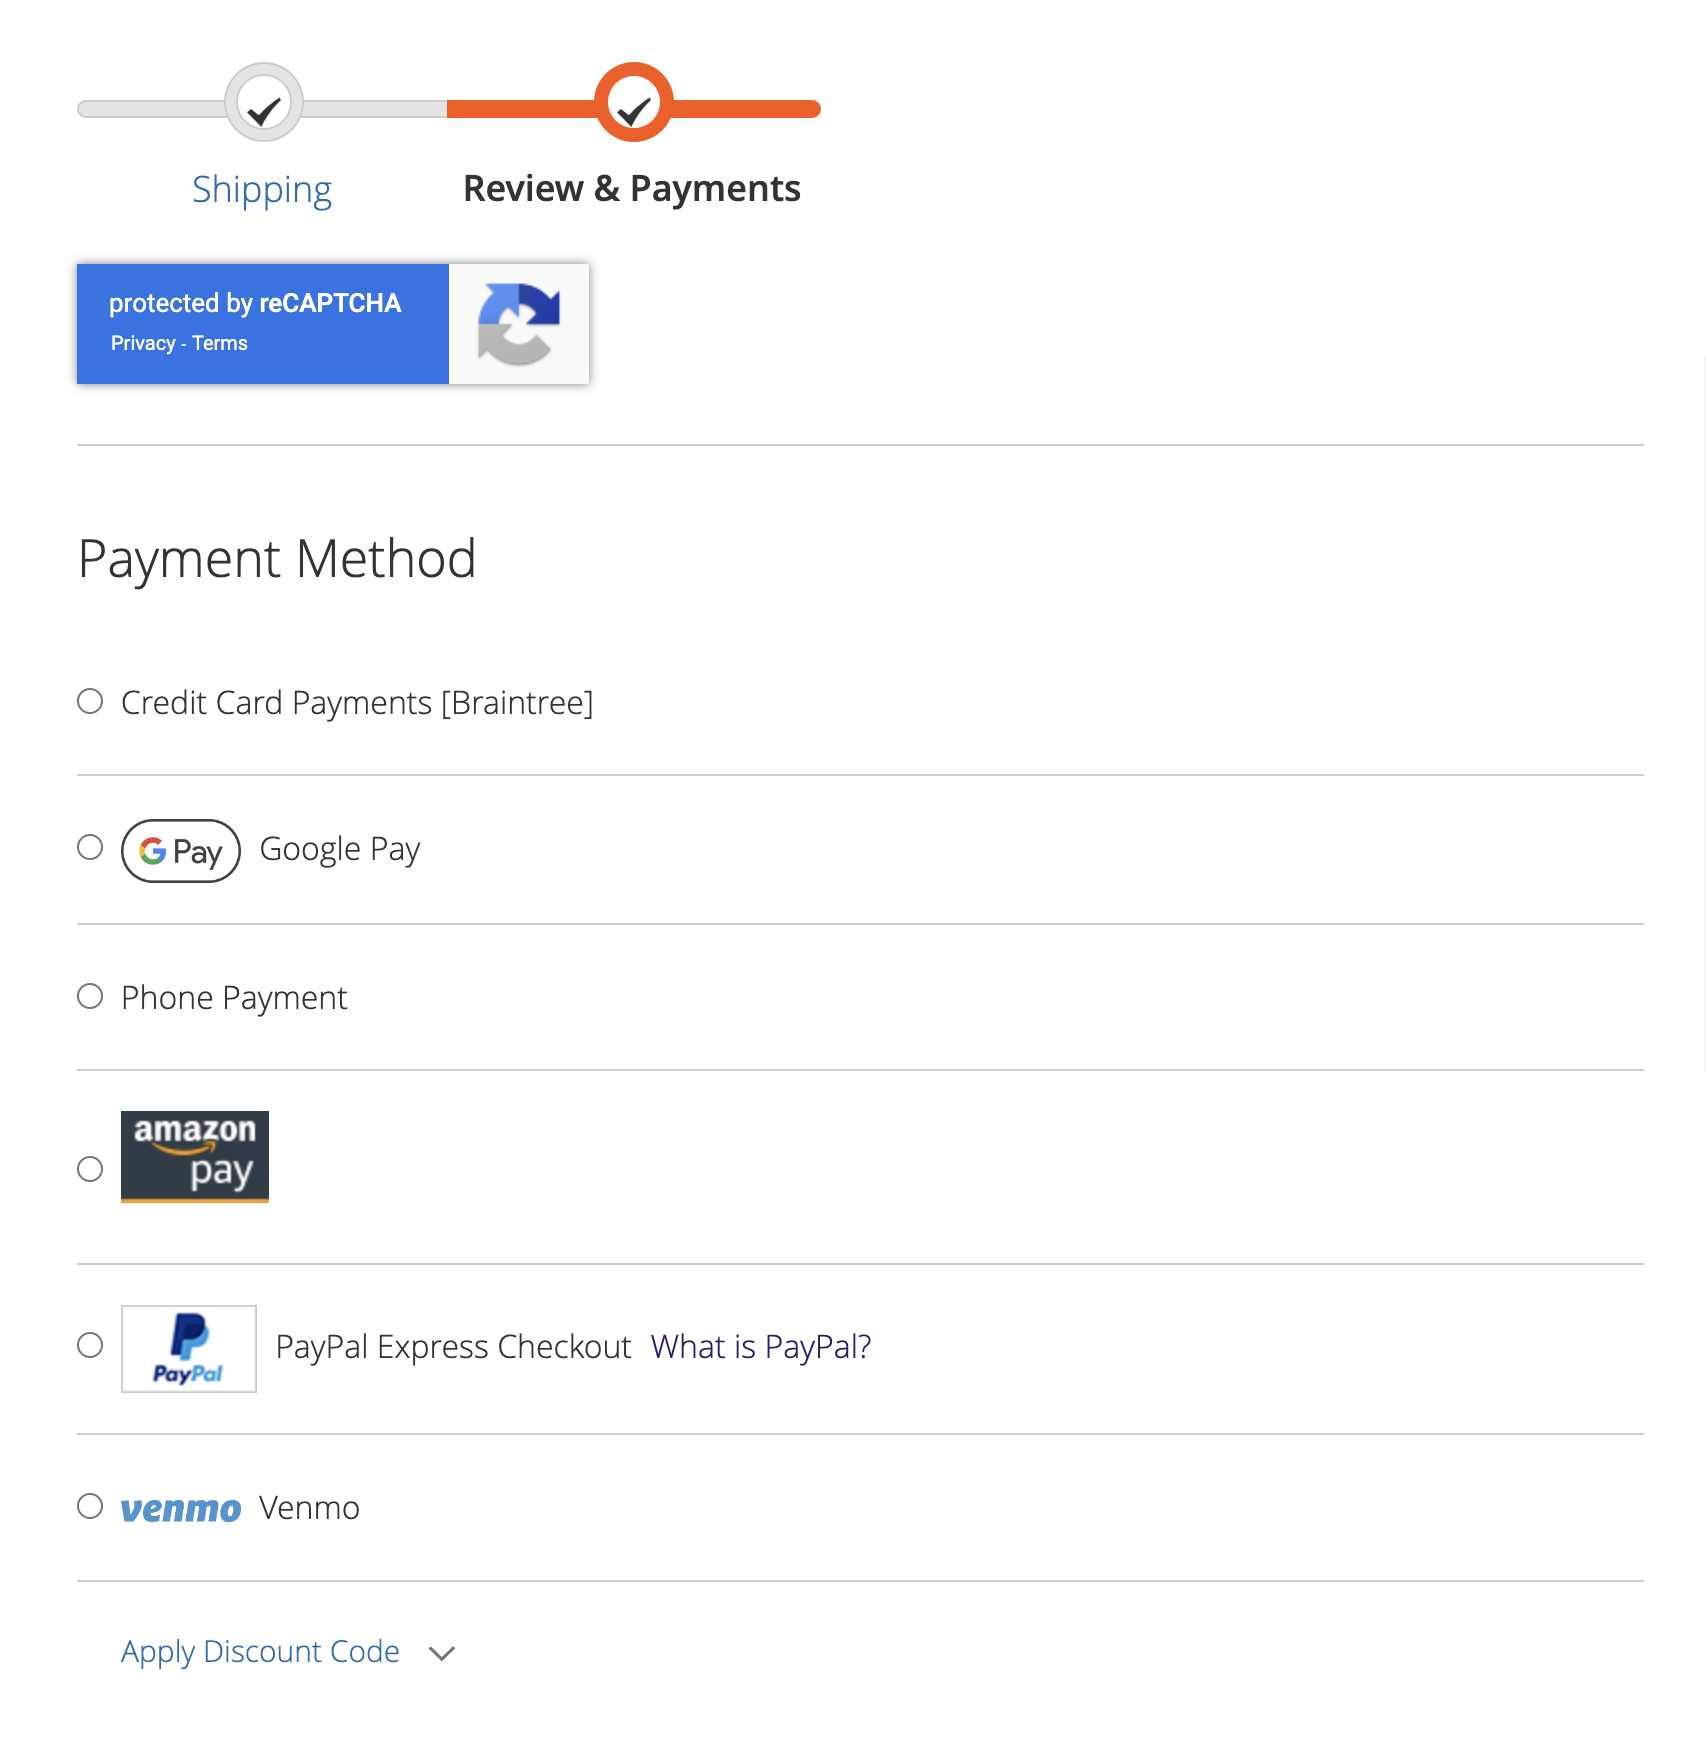
If you can be quickly alerted of a new code snippet added to the checkout page you can take action right away.
You can compare the current payment page with the reference HTML saved on the server.
If they are identical - it’s nothing to worry about. If they differ - the payment page changed and it’s time to investigate.
You can even automate this process with the help of Selenium WebDriver. It’s a special software that can control browsers programmatically.
Here is how I usually set things up for my clients.
I write a PHP script that:
Here is an example of such a script. It uses WebDriver PHP API:
payment.php:
namespace Facebook\WebDriver;
use Facebook\WebDriver\Remote\DesiredCapabilities;
use Facebook\WebDriver\Remote\RemoteWebDriver;
require_once('vendor/autoload.php');
$host = 'http://localhost:4444/';
$capabilities = DesiredCapabilities::chrome();
$capabilities->setCapability('loggingPrefs', ['browser'=>'ALL']);
$driver = RemoteWebDriver::create($host, $capabilities);
$driver->get('https://site/categories/');
$driver->wait()->until(
                    WebDriverExpectedCondition::titleContains('Category Products')
                        );
$driver->wait()->until(
                    WebDriverExpectedCondition::elementToBeClickable(WebDriverBy::cssSelector('.action.tocart.primary'))
                        );
$nextButton = $driver->findElement(
                    WebDriverBy::cssSelector('.action.tocart.primary')
                        );
$nextButton->submit();
$driver->wait(70,1000)->until(
                    WebDriverExpectedCondition::visibilityOfElementLocated(WebDriverBy::cssSelector('.add-to-cart-dialog'))
                        );
$driver->get('https://site/checkout/');
$driver->wait(40,1000)->until(
                    WebDriverExpectedCondition::visibilityOfElementLocated(WebDriverBy::cssSelector('#payment))
   );

$paymentPage = $driver->getPageSource();

file_put_contents('/home/payment/live.html',$paymentPage);
$old = file_get_contents('/home/payment/payment.html');
if($old != $paymentPage)
 echo 'hack';
else
 echo "GOOD!";
$driver->quit();
You will need the ChromeDriver for the script to work. Chrome Driver is a Chrome browser that can accept and run WebDriver commands.
The final Bash script:
run.sh:
#!/bin/bash
/usr/bin/Xvfb :0 -ac -screen 0 1024x768x24 &
DISPLAY=:0 /usr/bin/chromedriver --port=4444 &
#/usr/bin/chromedriver --port=4444 &
sleep 5
response=`/usr/bin/php /home/payment/payment.php`
if [[ $response != "GOOD!" ]]
then
        mail -s ‘Alert’ your@email < alert.txt
fi
kill -9 `pidof chromedriver`
kill -9 `pidof Xvfb`
Let the cron process execute this script daily to check for any unwanted code:
0 0 * * * /bin/bash /home/payment/run.sh
Takeaway
PCI compliance is an important part of a successful Magento 2 ecommerce business.
Investing time and money in security will pay back in the long run.
5 simple tips to make Magento 2 PCI compliant:
Find this article useful? Share it on LinkedIn with your professional network, spread the knowledge!
If you find this post interesting do not hesitate to sign up for our newsletter and join the 1007 people who receive Magento news, tips and tricks regularly.
Thank You!


