
Let’s optimize Magento 2 speed on mobile platforms. We will use a sample data installation on a Luma theme. I will show how to go from 10 seconds page load time down to 2.7 seconds as measured by Google Chrome Lighthouse.
I will use a Speed Index to measure performance.
I will work on a homepage as an example, but we check product and category pages later in the article as well:

Initial Setup
I am using a Magento 2.4.6p3 version:
php bin/magento –version
Magento CLI 2.4.6-p3
The site is installed on a 2013 Macbook Air with Nginx, Elasticsearch, Php 8.2 and Mysql v8. I don’t use Redis and sessions are stored on a disk. You will get even better results with storing cache, full page cache and sessions in Redis.
I have Full page cache on and I’m in production mode.
php bin/magento deploy:mode:set production
php bin/magento cache:enable
Here is our original lighthouse score:

This is what it asks us to do to improve speed:
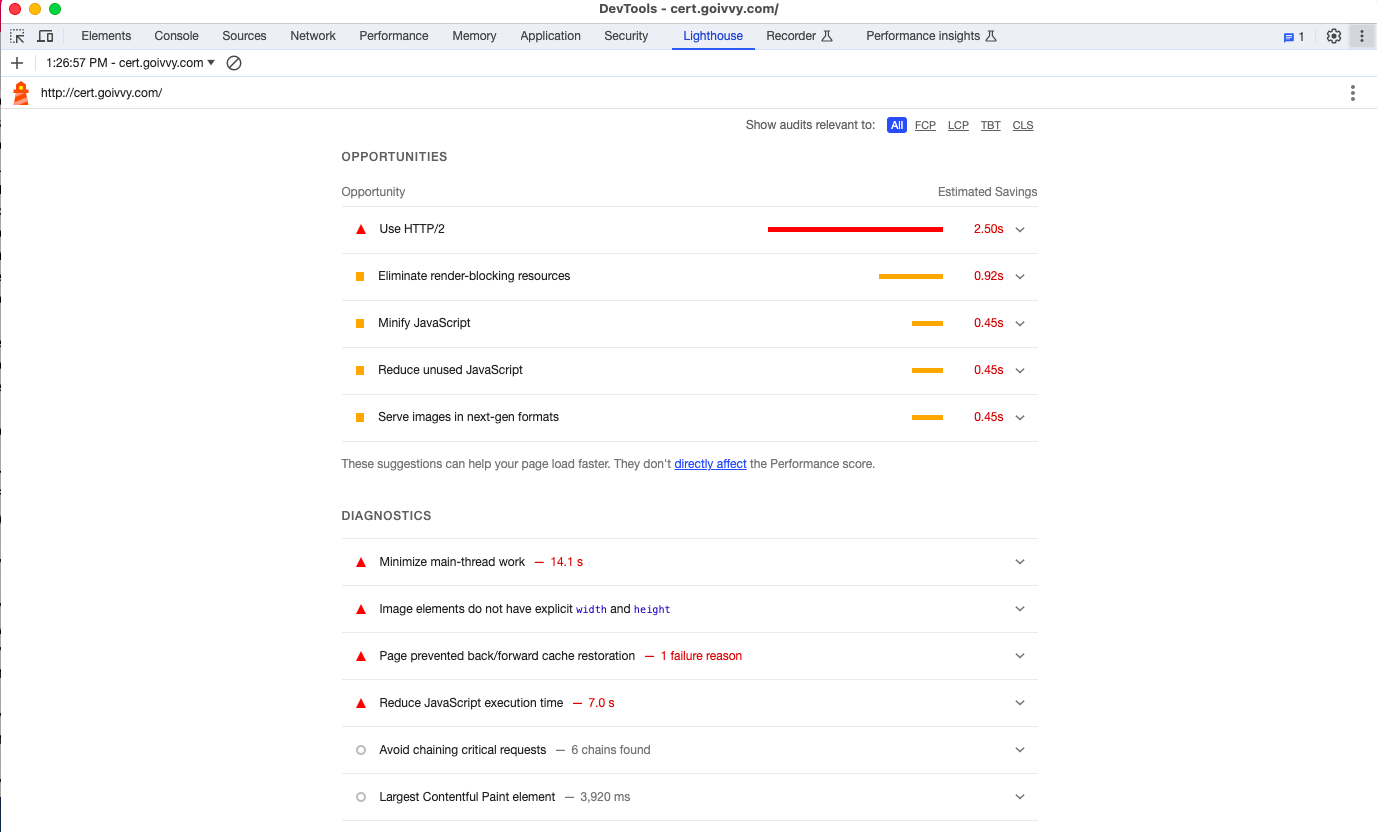
Let’s fix issues one by one.
Use HTTP/2
HTTP/2 is a new version of http protocol. It’s faster and more secure.
If you are hosting on a well known provider you probably have it on. But it always makes sense to double check.
In my case I’ll go ahead and fix nginx configuration with the following:
listen 443 ssl;
http2 on;
For nginx prior to 1.25.1 you can use:
listen 443 ssl http2;
Make sure you run the site over SSL, http2 isn’t working over a plain 80 port.
Let’s restart nginx and re-evaluate performance:
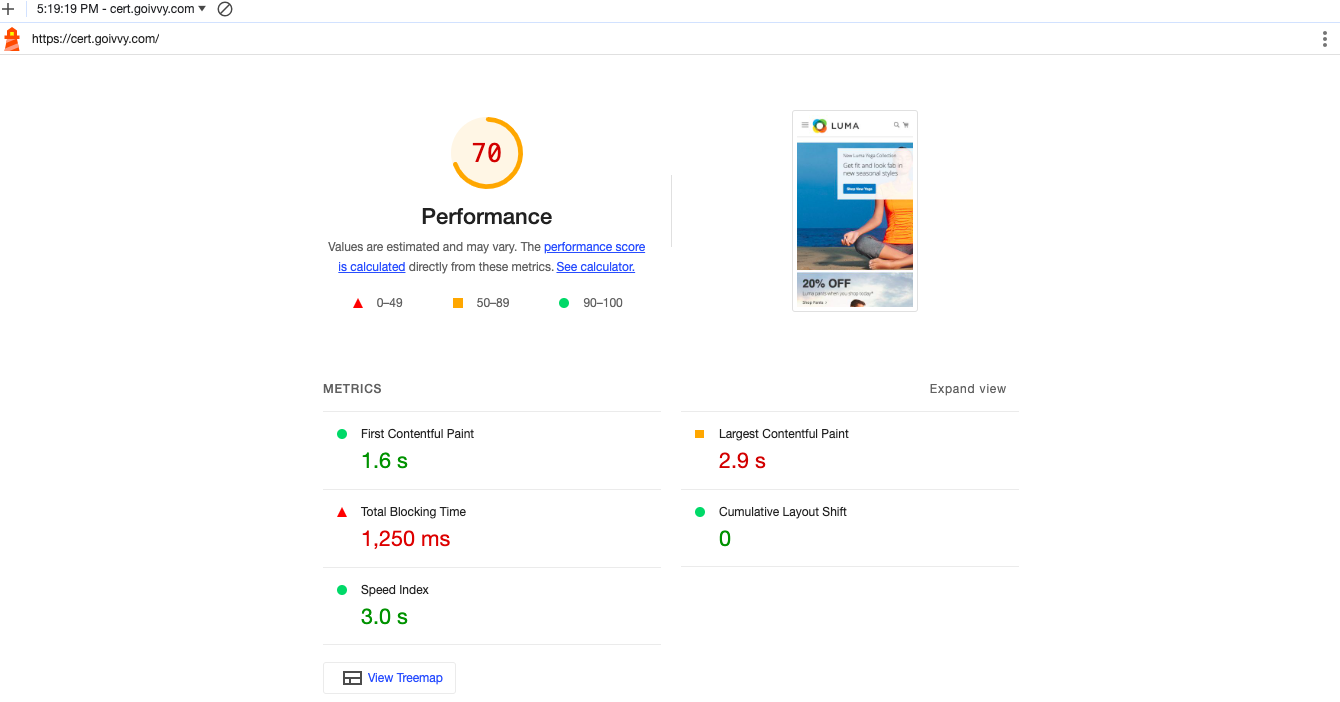
Now, it’s a lot better. There is still some work to do but HTTP2 really makes a difference.
Opportunities section looks like this now:

Next I will enable CSS/JS minification and merging:
Minify and merge Javascript and CSS
This is a built-in feature of Magento 2.
If you are OK with running SSH commands you can enable merge and minify like this:
php bin/magento config:set dev/css/merge_css_files 1
php bin/magento config:set dev/css/minify_files 1
php bin/magento config:set dev/js/minify_files 1
php bin/magento config:set dev/js/merge_files 1
Make sure you recompile afterwards:
php bin/magento deploy:mode:set production
Now, the score and speed index look better:
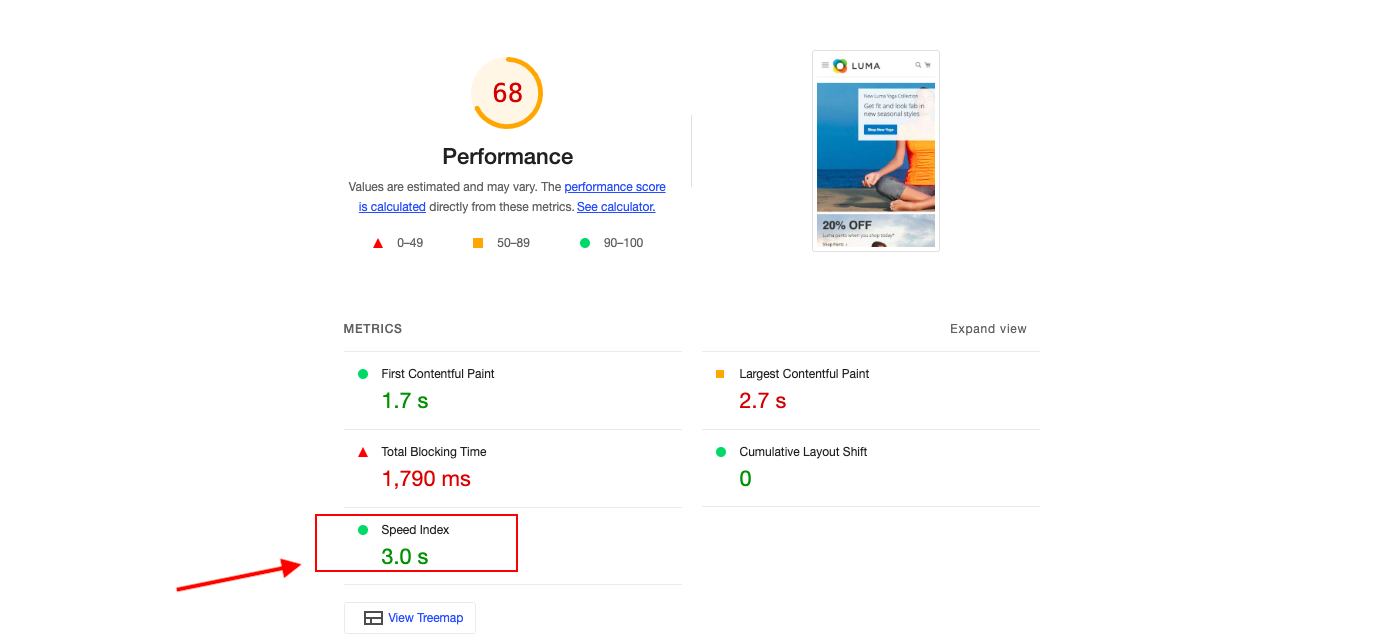
Here is what’s left to do:
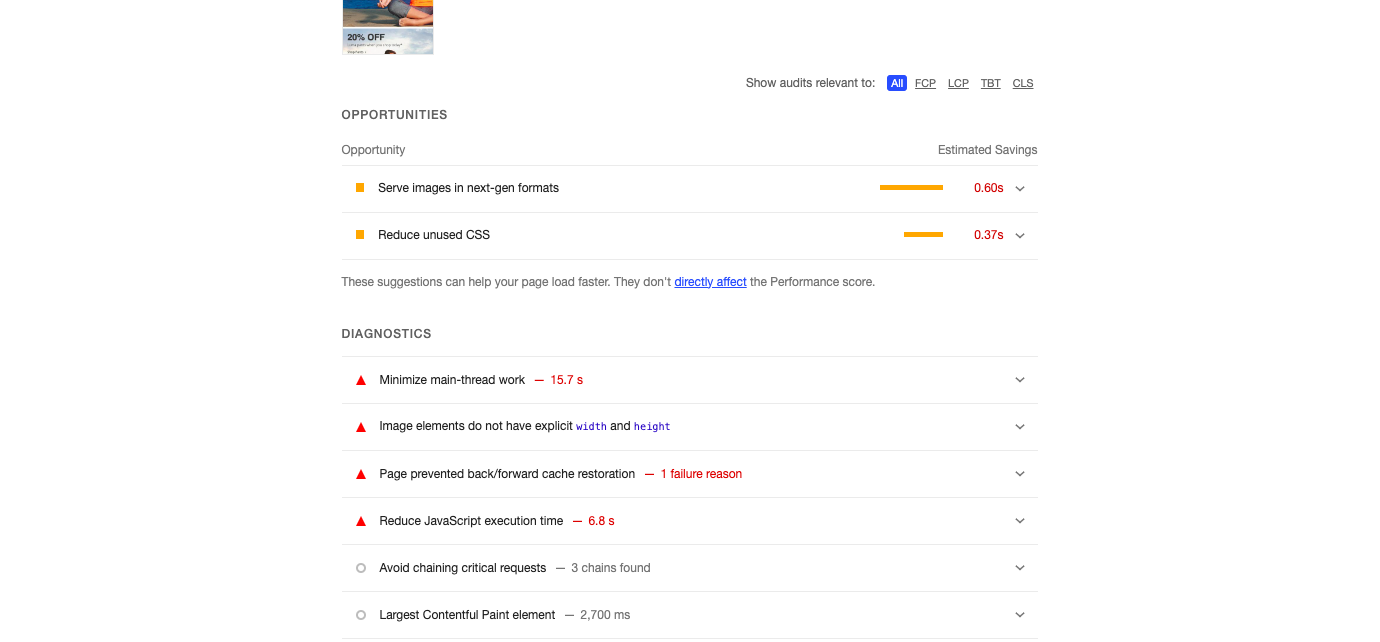
Serve images in next-gen formats
WebP and AVIF image formats provide better compression (i.e. they weigh less) than JPEGs and PNGs.
You can manually convert images or use an extension that does that. I’d suggest taking a look at jajuma webp module on Adobe Marketplace, it works great on a few websites I worked on.
In this article I will use cwebp command line tool to convert images. You can use cwebp on Linux, Mac and Windows:
cwebp image.jpg -o image.webp
On average it optimized image size in half in my case.
We will use an HTML5 picture tag to serve images so that we could fallback to old formats in unsupported browsers.
I will convert this:
<img src=”/media/image.jpg” alt=”Image” title=”Image”/>
To this:
<picture>
        <source type="image/webp" srcset="/media/image.webp"/>
        <source type="image/jpg" srcset="/media/image.jpg"/>
        <img src="/media/image.jpg" alt=”Image" title="Image"/>
</picture>
I did this for every image on a page.
Reduce unused CSS
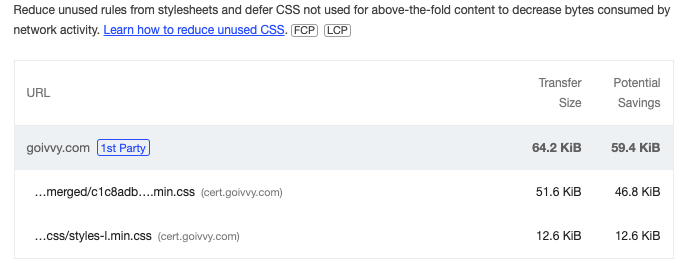
More than 90% of CSS rules are not being used. We can greatly improve speed if we just remove those redundant styles.
I’m yet to figure out how to automate this process. For now I’ll manually cut unused CSS.
Google chrome coverage tab will help me. It shows usage visualization and it’s pretty handy in Magento 2 speed optimization.
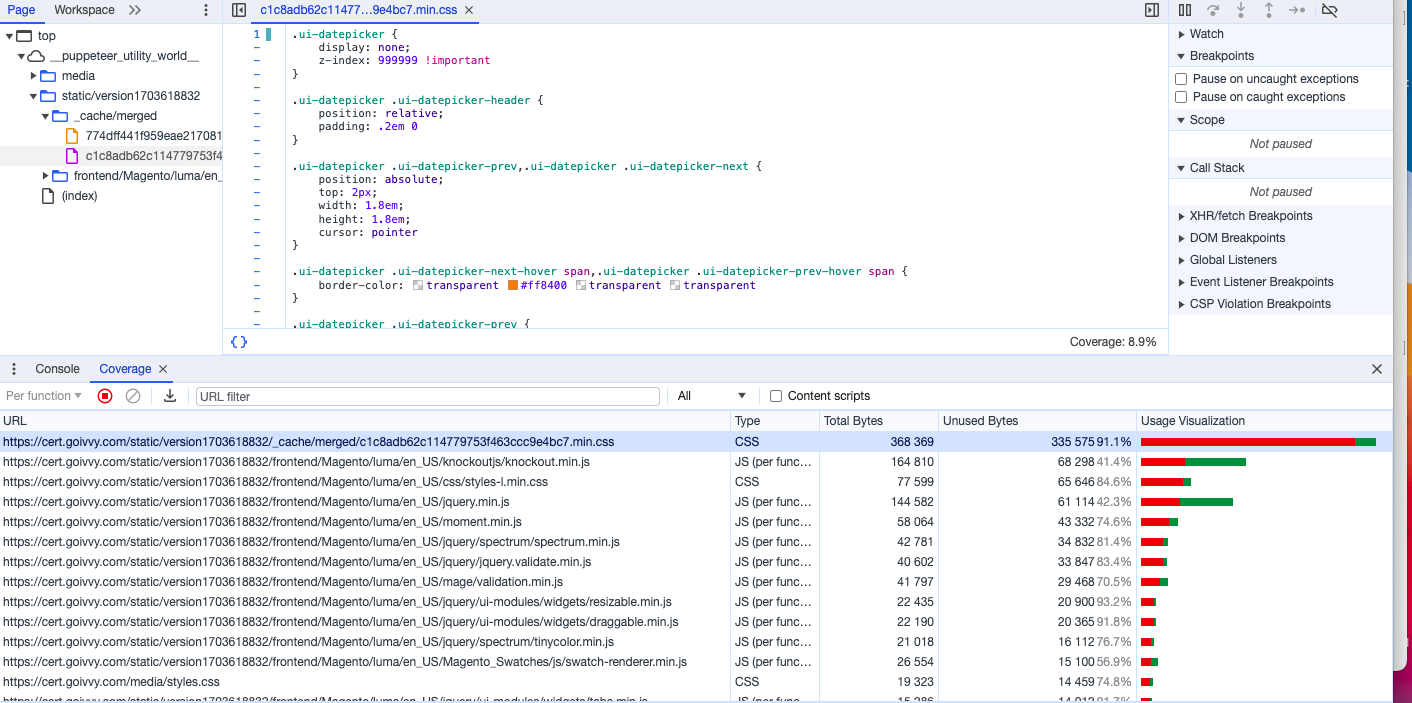
A little bit of information on how to turn on coverage as it might not be straightforward. Open up chrome developer tools and click on three dots icon:
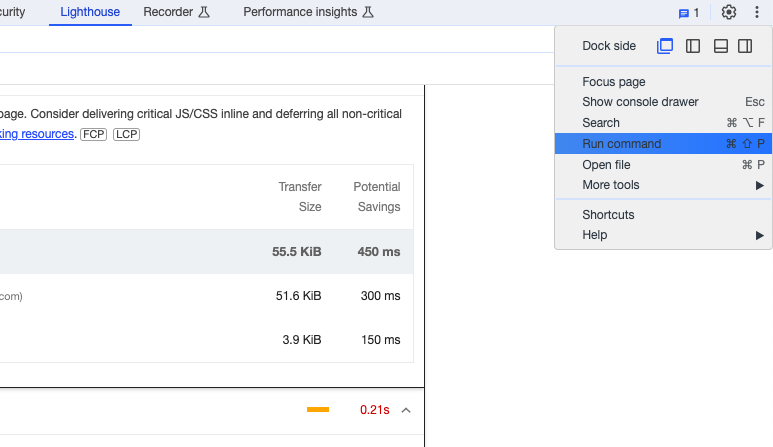
Click on Run command and start typing Coverage:
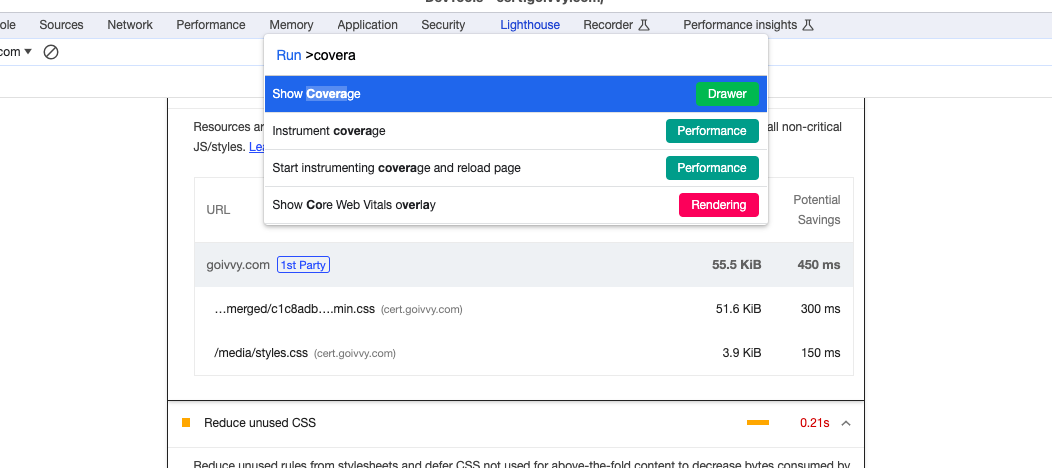
Click on Show Coverage and it will appear.
Now click on a reload button and start capturing:

Right after that I will go ahead and browse the page, scroll it up and down and hover over the top menu. You need to use every function of a page to make sure all required CSS get registered as being used.
It also makes sense to change browser window size to capture responsive styles.

Once we’ve done all that, let’s go ahead and click on a Stop button and analyze .css files:
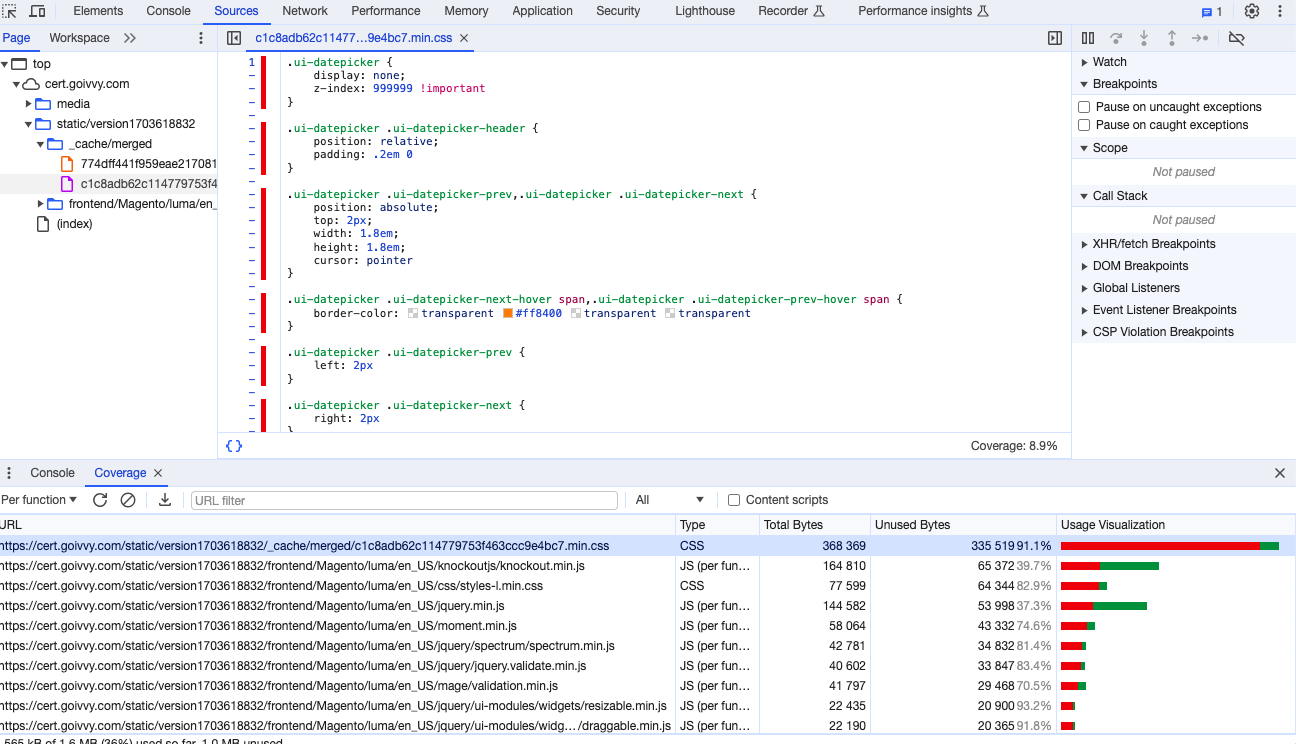
Red lines next to rules mean those styles are redundant. Green lines mean we need to keep those rules.
Now comes the hard part. Let’s go over all CSS files and copy all the green styles into a special file and call it coverage.css. The process might take some time. Just make sure you don’t miss anything and respect @media directives for various screen sizes.
Once we have the coverage file ready let’s inline it in the head section of the page and remove all the other CSS files:
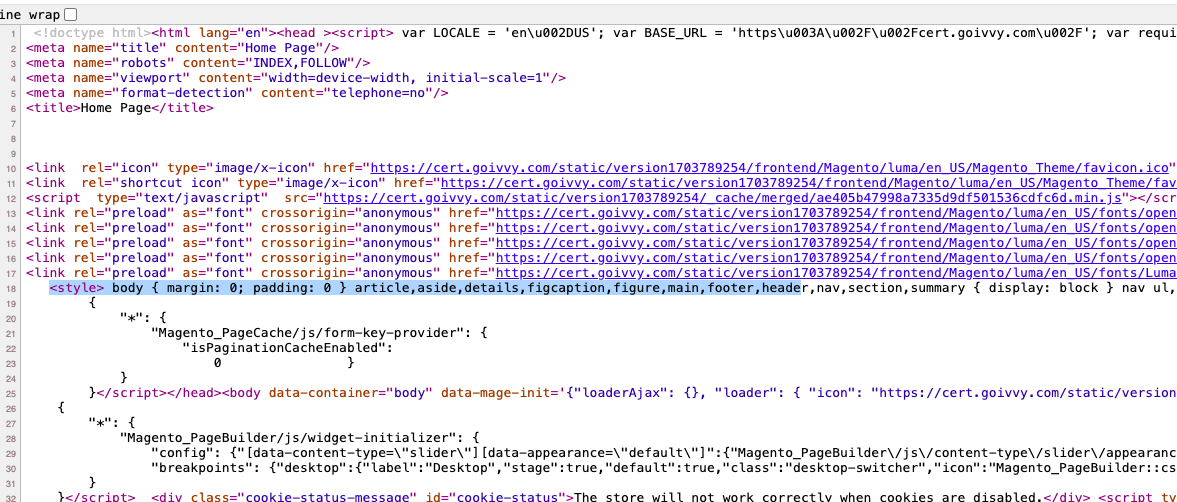
I removed CSS with a use of a plugin on Magento\Framework\View\Result\Layout:
app/code/Goivvy/Custom/etc/frontend/di.xml:
<type name=”Magento\Framework\View\Result\Layout”>
     <plugin name=”goivvy-css” type=”Goivvy\Custom\RemoveCSS”/>
</type>
You will need to repeat the process of removing unused CSS for product, category and cms pages. You could also optimize cart and checkout pages.
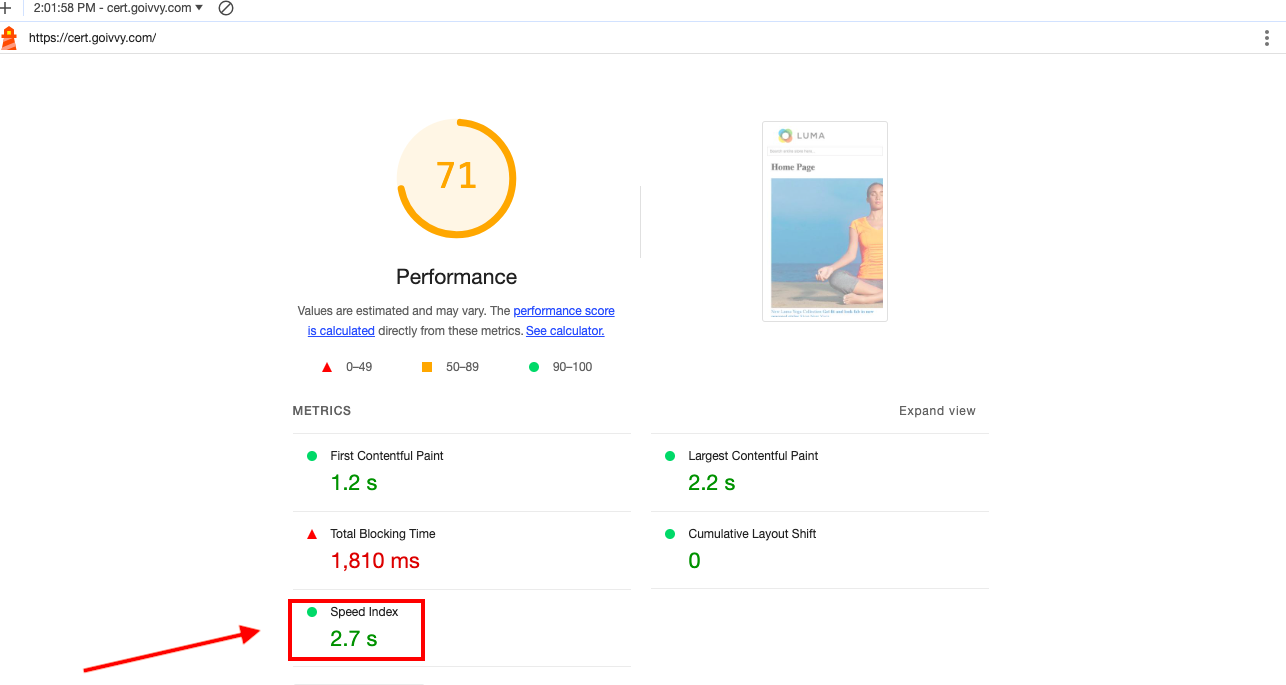
Now we have speed index at 2.7 seconds:
We can go even further and use a couple of the new features of Magento 2.4.
Use CSS critical path
With the latest Magento 2.4.6 you can inline critical CSS and defer all non-critical. It will improve start render time and help with passing core web vitals checks.
To turn it on, switch to a developer mode:
php bin/magento deploy:mode:set developer
And go to Stores > Configuration > Advanced > Developer > CSS Settings > Use CSS critical path:
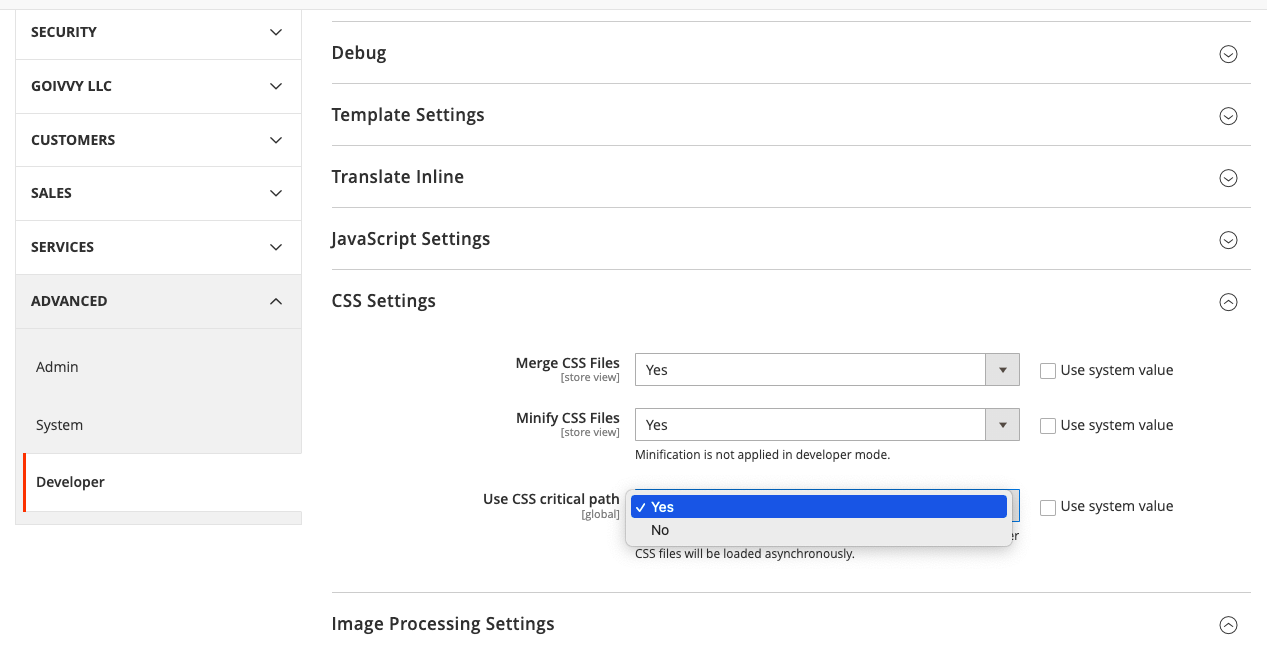
Since we are using the default Luma theme, critical.css has already been composed for us. If you are using a custom theme you might want to compile critical CSS either manually or using tools like Penthouse or Critical.
I prefer to extract above-the-fold styles manually. It’s less error prone and more accurate.
Move JS code to the bottom of the page
I have a Magento 2 extension that defers JS loading. Now this feature is included and you don’t really need a module for it.
What it does is it moves Javascript to the page bottom. It also improves Start Render time.
Switch to the developer mode and go to Stores > Configuration > Advanced > Developer > JavaScript Settings > Move JS code to the bottom of the page:
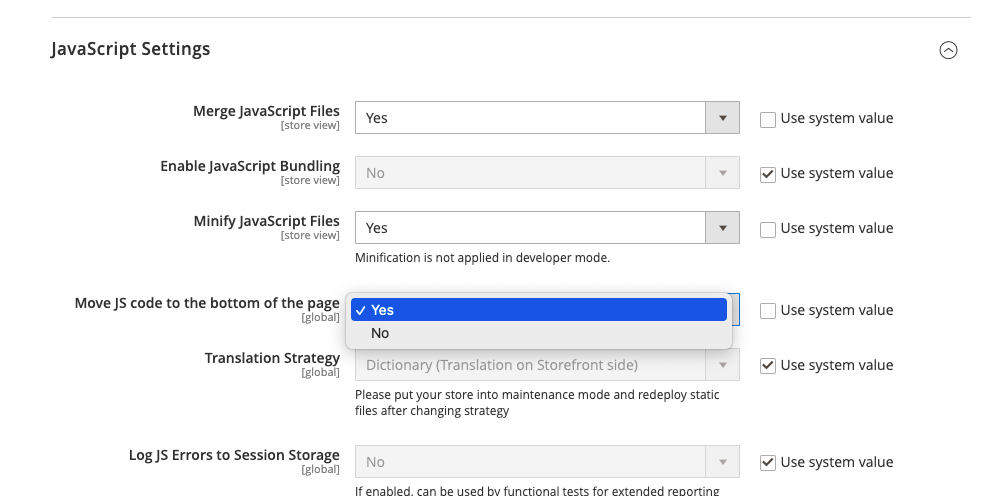
Set it to Yes and recompile:
php bin/magento deploy:mode:set production
In the end
I’ve managed to drop the speed index from 10.0 seconds down to 2.7 seconds. It wasn’t really hard but that’s because I was using the Luma theme. That theme is simple but doesn’t rely on much CSS and JavaScript.
You might use a more complicated theme. It could have more images and fancy features.
You can still follow my instructions and apply techniques I described in this article. I tried to explain them as best as I could. If you have any questions - you are welcome to leave a comment.
If you need assistance with optimizing performance of your Magento 2 - don’t hesitate to contact me today. I can help!
Find this article useful? Share it on LinkedIn with your professional network, spread the knowledge!
If you find this post interesting do not hesitate to sign up for our newsletter and join the 1007 people who receive Magento news, tips and tricks regularly.
Thank You!


Here’s a 7-line comment for the article on Magento 2 speed optimization:
---
This article does an excellent job outlining crucial strategies for speeding up Magento 2 stores. The tips on caching, image optimization, and code minification are particularly effective in improving performance. I appreciate the focus on database optimization, which is often overlooked but critical for fast load times. The inclusion of practical tools and extensions for enhancing Magento 2 speed is a great addition. It's also helpful that the article emphasizes the impact of faster load times on user experience and SEO. A brief mention of performance testing tools would have been an additional valuable resource. Overall, this is a comprehensive guide that provides actionable steps for anyone looking to optimize their Magento 2 store.